LMS systems power your course-selling websites. There are many sorts of LMS out there, but most LMS are built with some core features and functionalities. Before populating your platform with courses, videos, instructor profiles, and other materials, it would be wise to configure some parameters to set things right. Also, features in your plugin’s settings panel may make the experience of your site even better. In this article, we will discuss what an ideal configuration should be for your LMS system in the admin panel.
For convenience, we are using the LifterLMS plugin for WordPress, the best LMS plugin for WordPress. Why? Because this plugin has a very robust list of core features compared to the industry and the user interface is also very friendly to navigate.
Let’s start our step-by-step guide to configuring an LMS on WordPress.
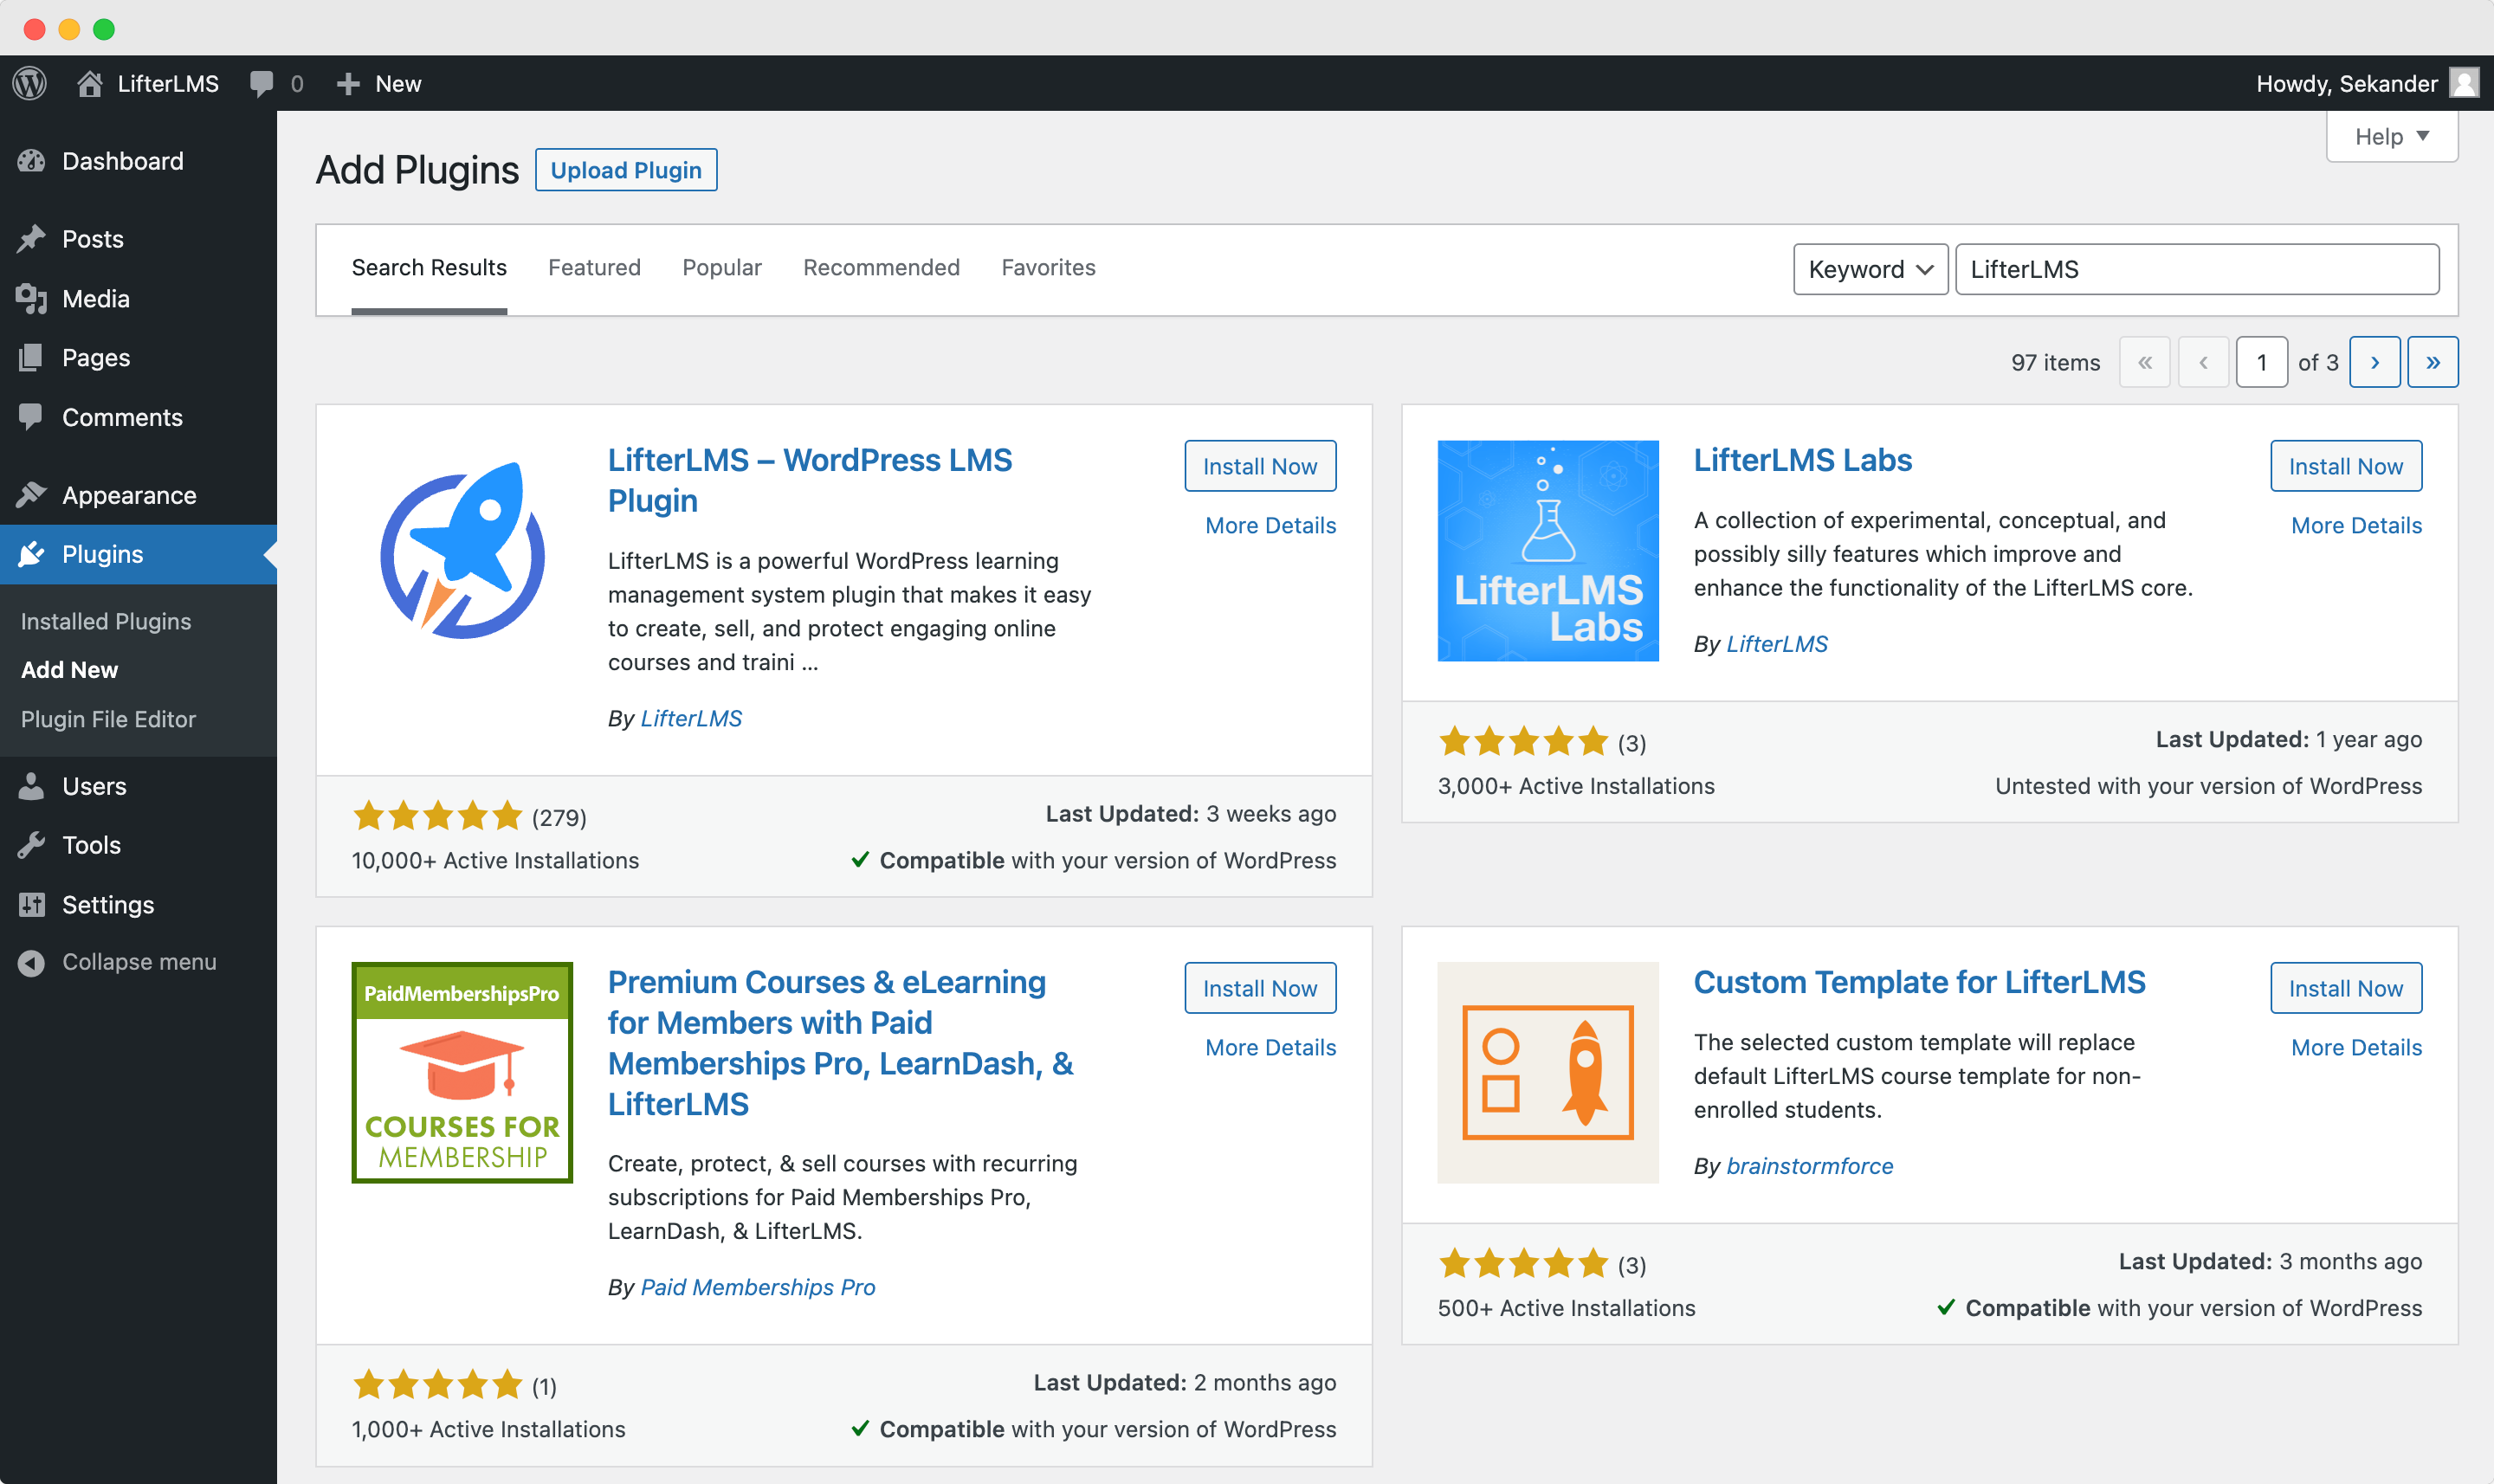
Step 1 – Installing an LMS Plugin
- Go to your WordPress dashboard > Plugins > Add New and search for “LifterLMS”.
- Click on the “Install Now” button and activate it when done.
If you’re installing the plugin for the first time, you will be welcomed to an onboarding screen to help you configure your online learning platform the way you like. Just follow the onscreen instructions and select the options you want. If you prefer to configure the system with more precise control, we have covered that later in this tutorial.
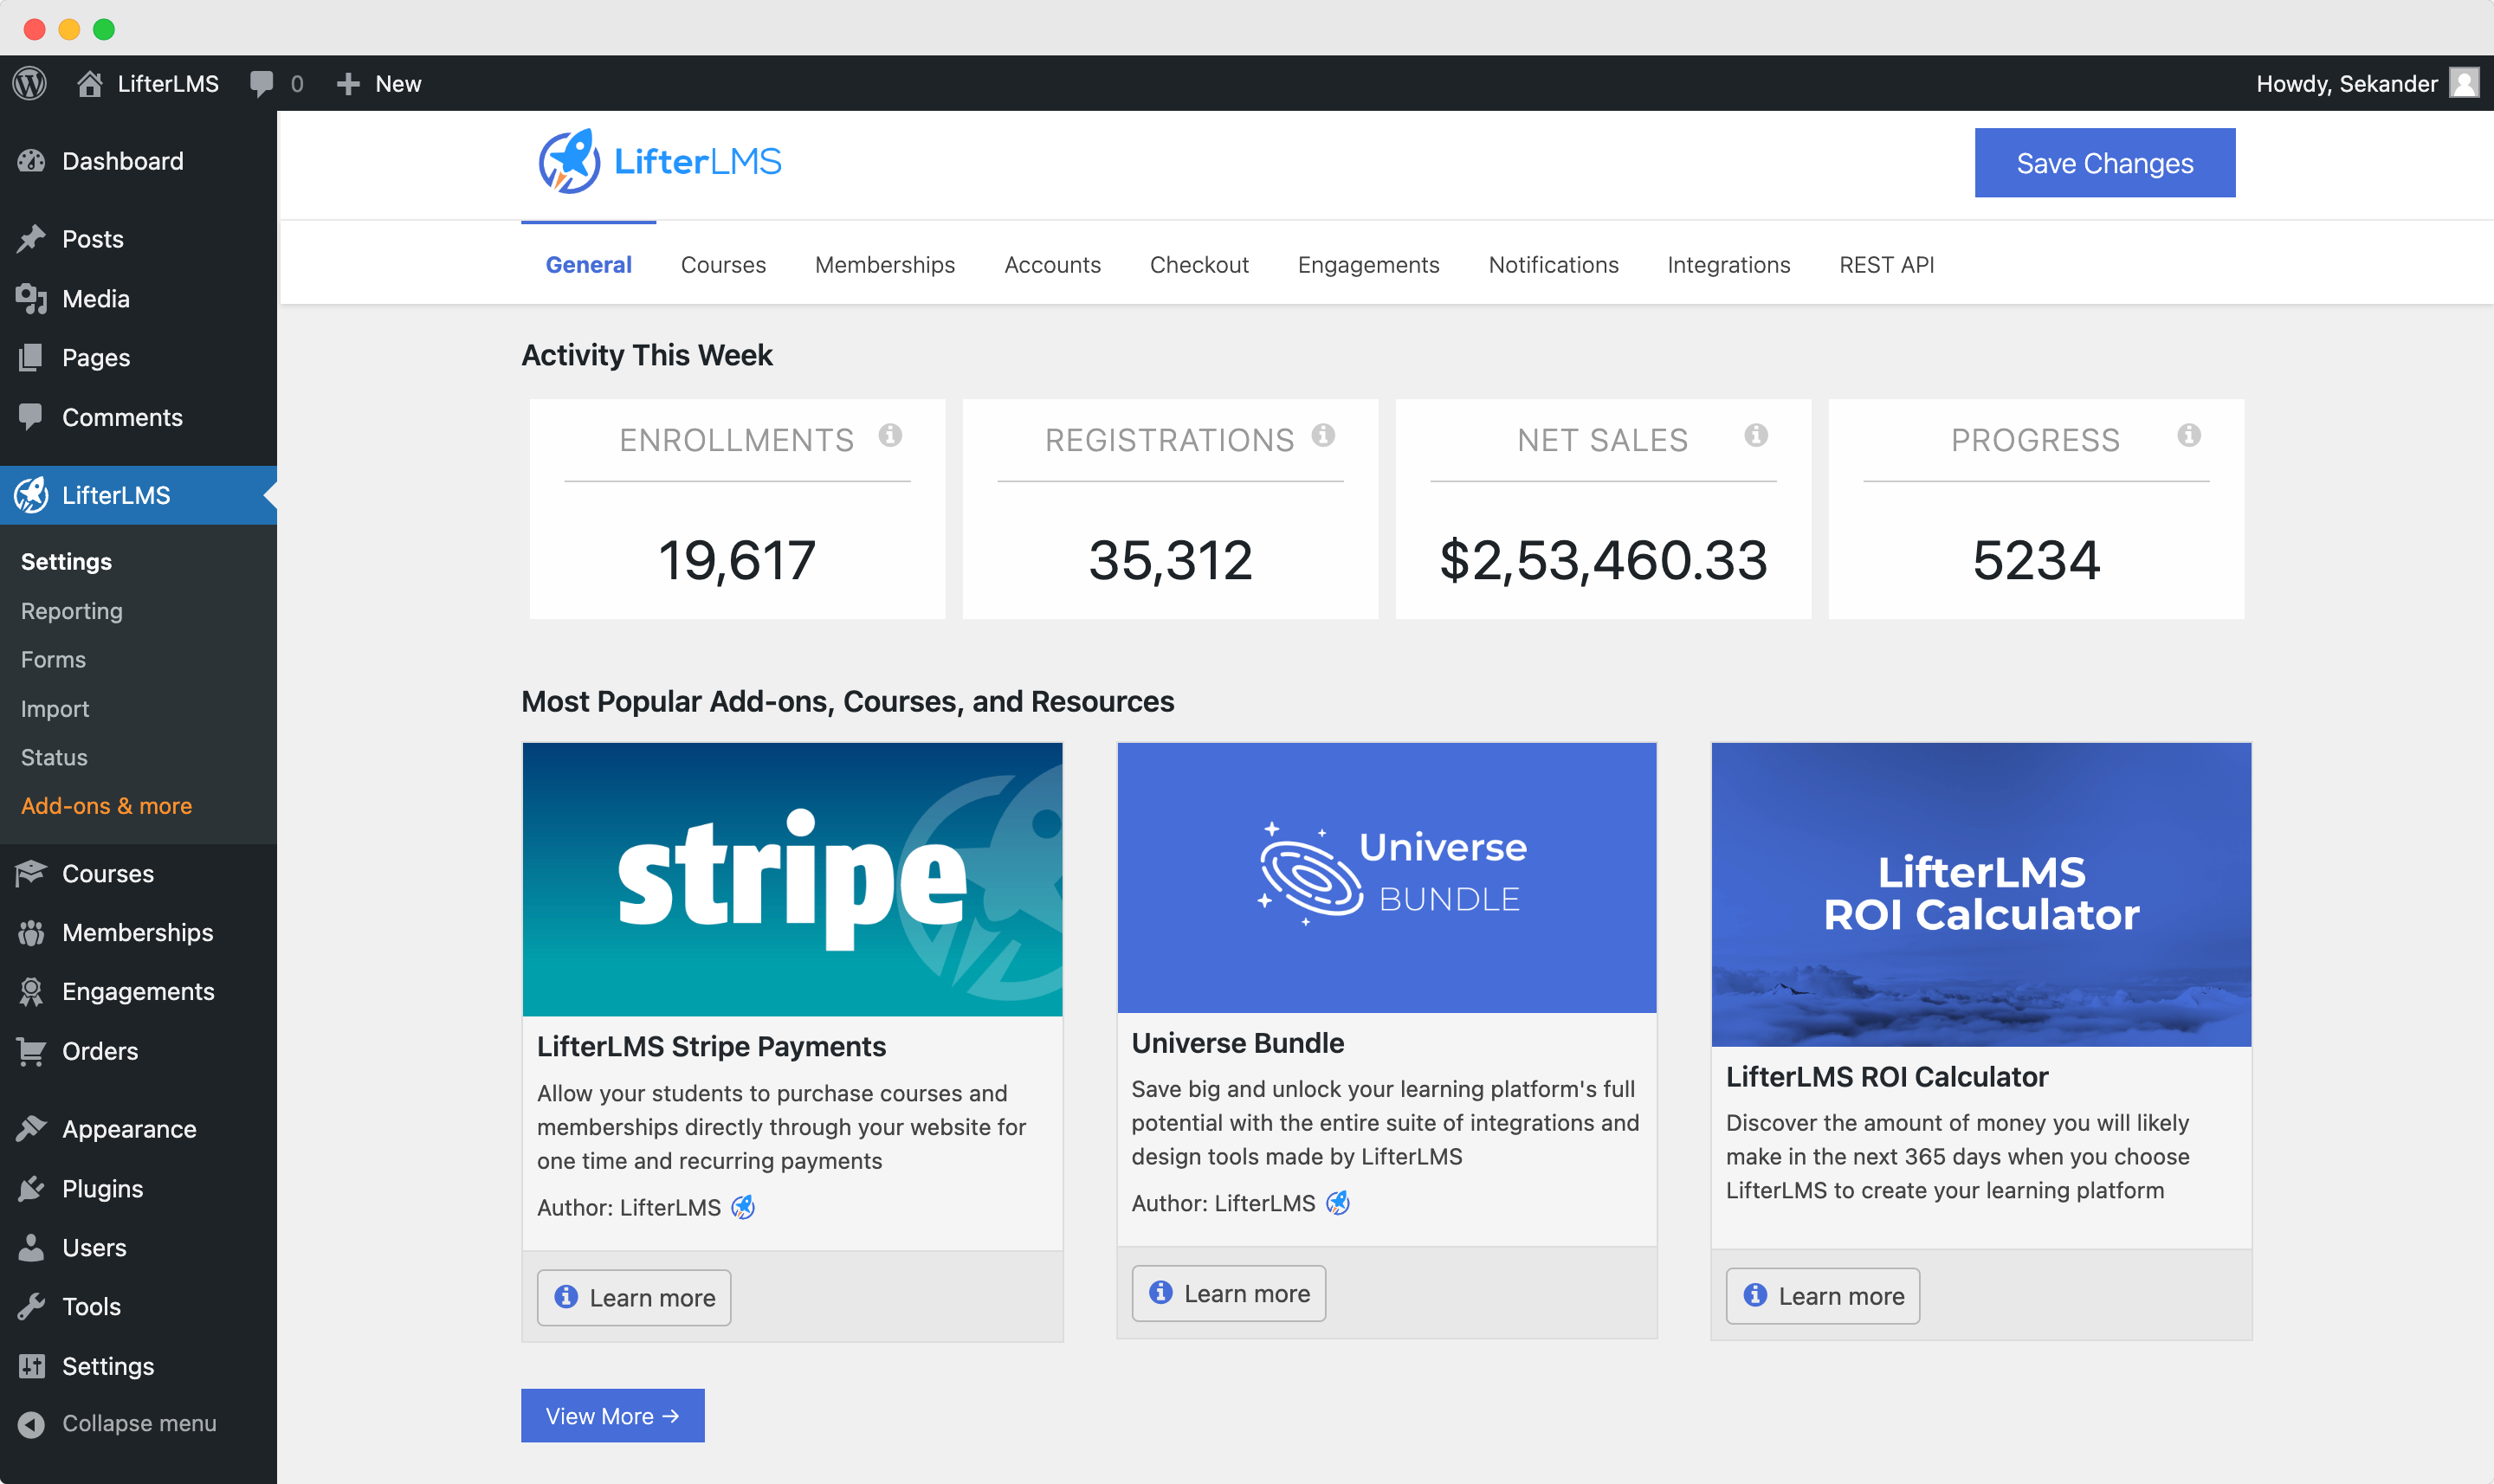
Step 2 – Configuring the LMS Settings
From your Dashboard, go to LifterLMS > Settings, and you will find all the settings options from here in the tabs. Courses you upload, if you want to create memberships, if you want to access all individual accounts, how your billing and checkout are handled, and some other features like how you can automatically engage with your learners, notifications can be accessed and set up here. Also, any API and integration can be accessed here.
Additionally, LifterLMS gives you a mini dashboard right under the settings. This feature is available to all users. We also have a separate reporting system where you can see the student reports and course data in a very detailed manner.
Course Settings
You can configure the landing page from the courses settings, such as how many to show per page, the sorting, and on which page other than the default your courses will appear in.
For courses focused on videos, you can change global settings if they mandatorily need to watch the video attached to the course and when the video is completed if they need to be redirected to the next activity automatically. Pretty neat, right? It takes all the hassles out of the way for the student to focus quickly on learning.
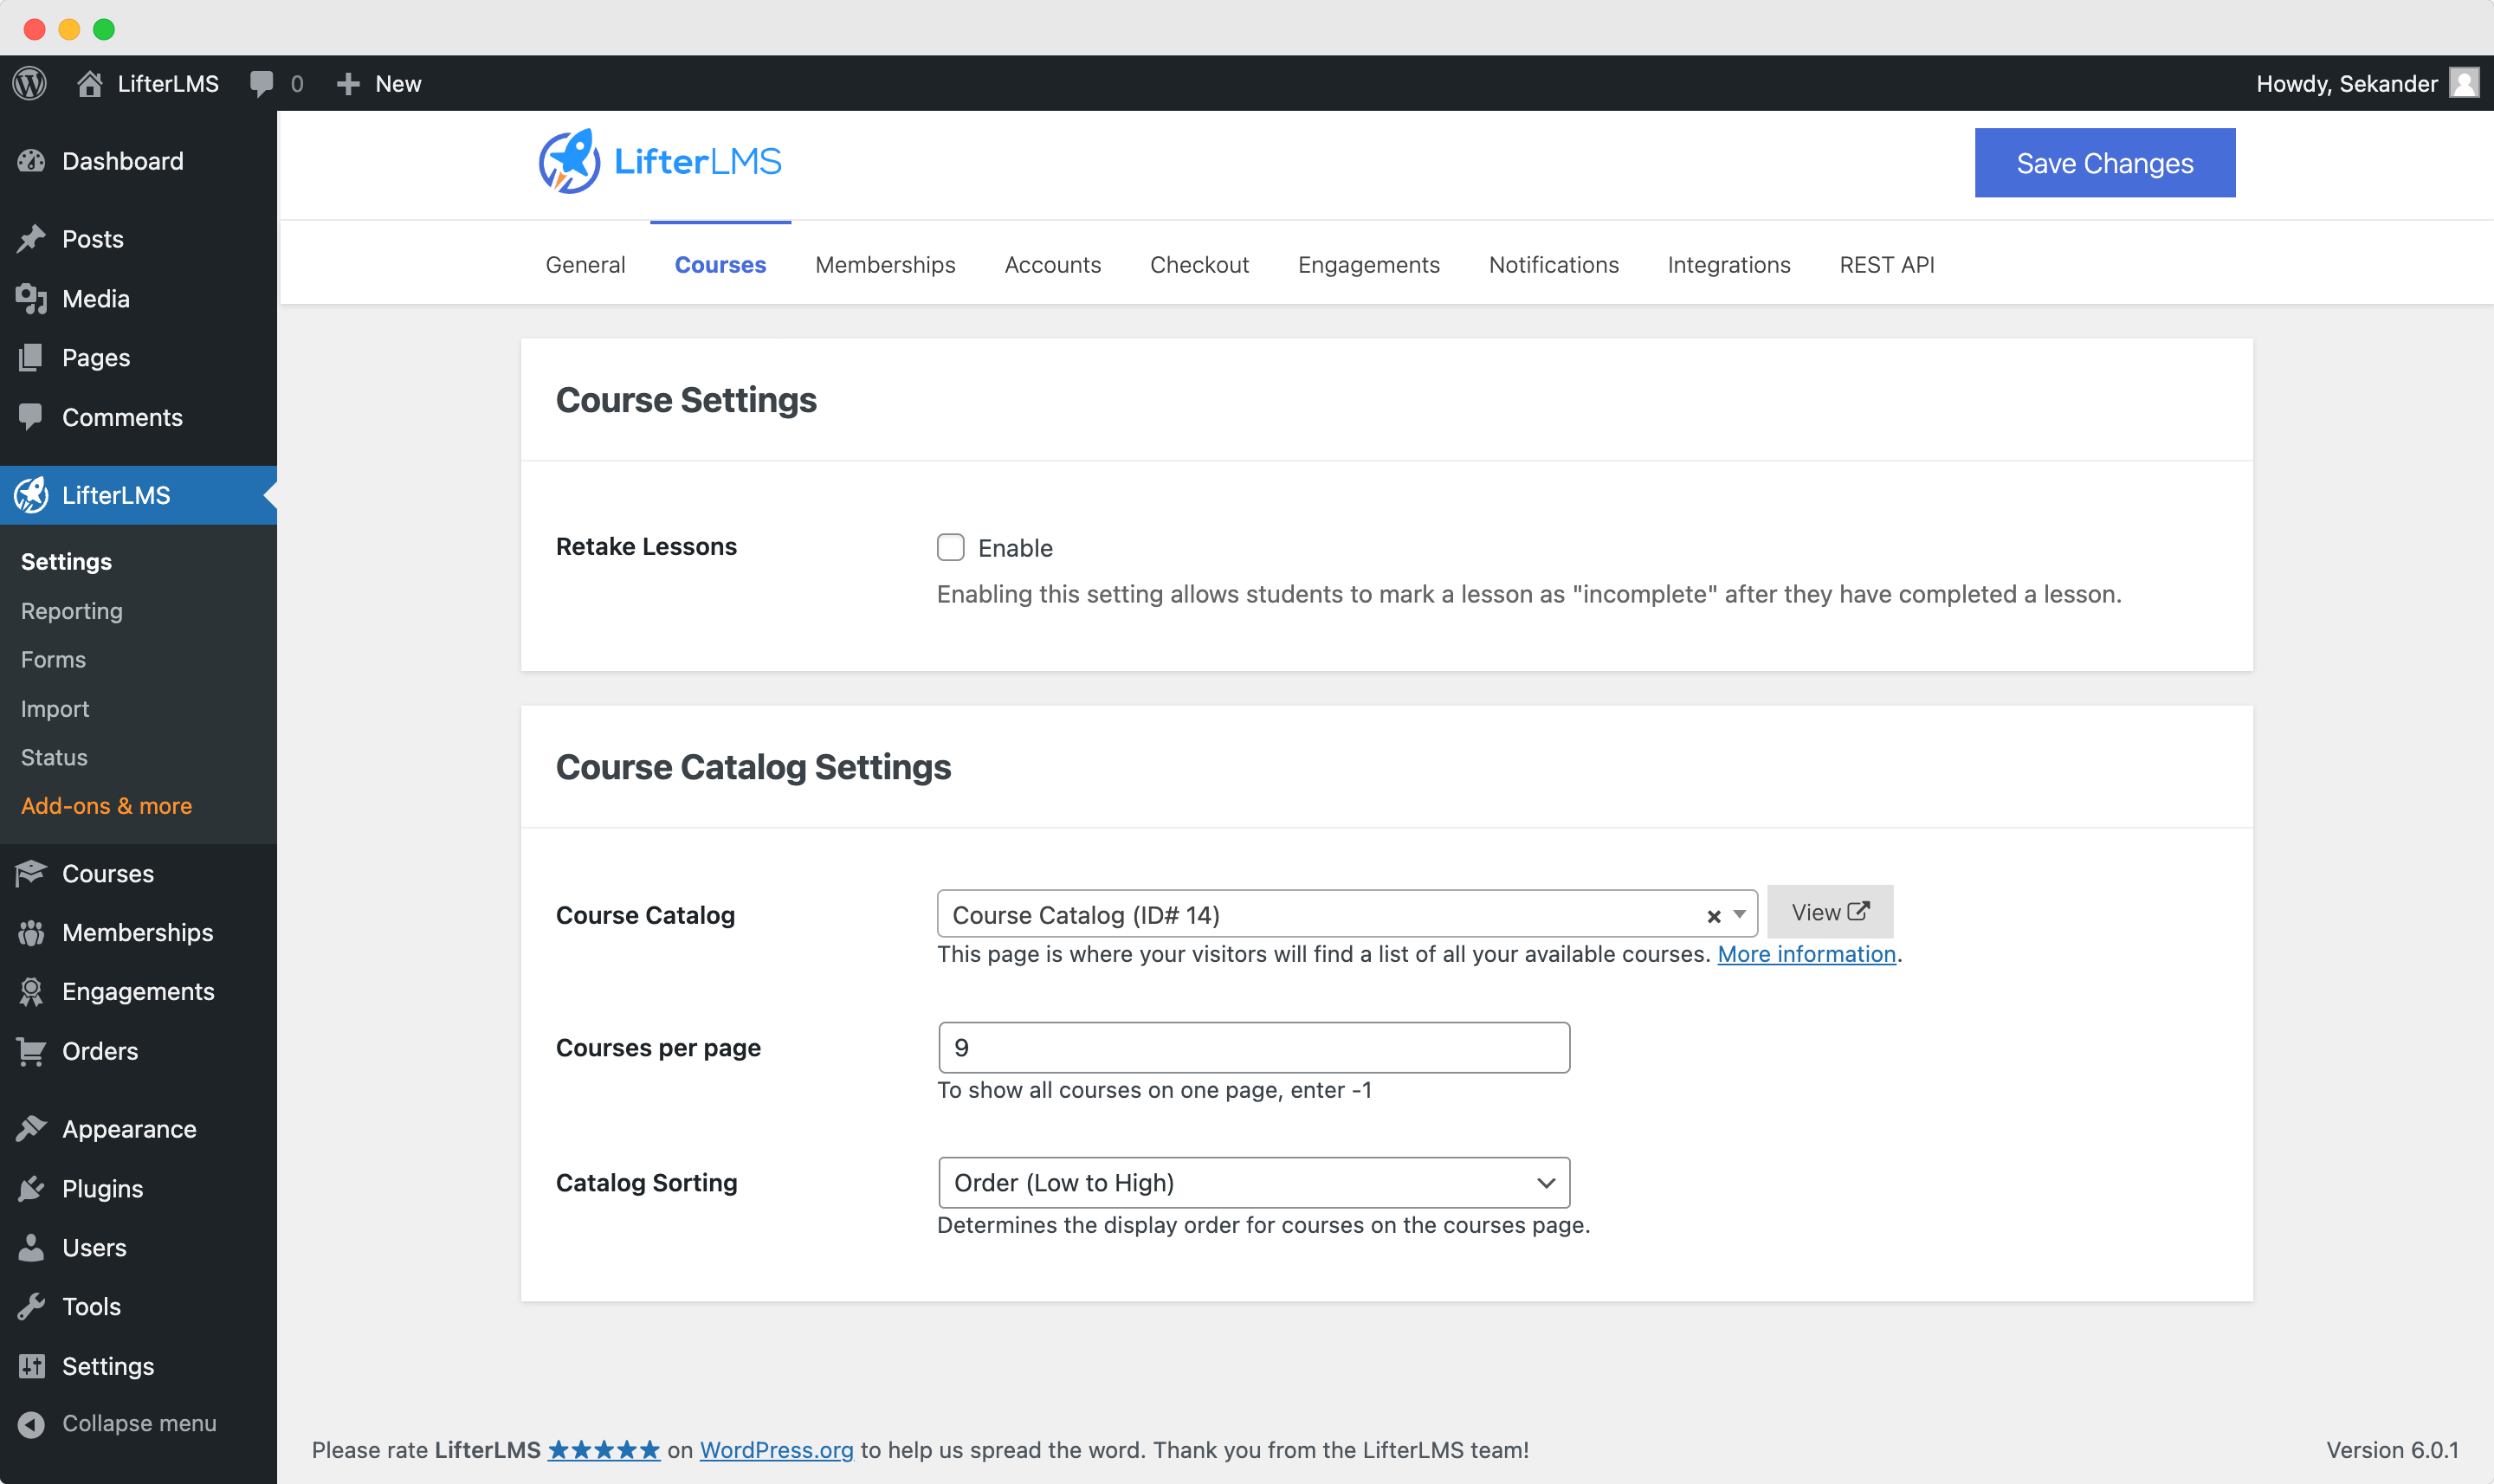
Thinking of what users might need, LifterLMS has a quick link to preview that page!
You can visit our documentation on how to use and configure the course system to understand the whole process of how you can create and plan your courses on LifterLMS.
Membership Features to Configure Paywalled Courses
Now, most plugins do not have a built-in membership feature and will require buying their premium integrations, but LifterLMS can create memberships immediately. You do not need additional money to have membership features on your LMS system!
You can dedicate your learning site to only members if you activate the restricted settings.
Whereas other more standard features like where the membership options are displayed can be accessed in the tile below.

If you are unsure about something, use the default values. For advanced customization, you can check the plugin documentation as well.
Managing Accounts for Your Learners
The primary users of your website are students. So, when choosing your LMS platform, you must know if it has features to make your students feel accomplished and enough tools to facilitate their learning experience.
In LifterLMS, the student dashboard has a lot of features. The plugin automatically creates individual pages for grades, courses, subscribed memberships, completion status and achievements, certificates, course and membership purchase history, and SMS and email notifications for reminders and announcements.
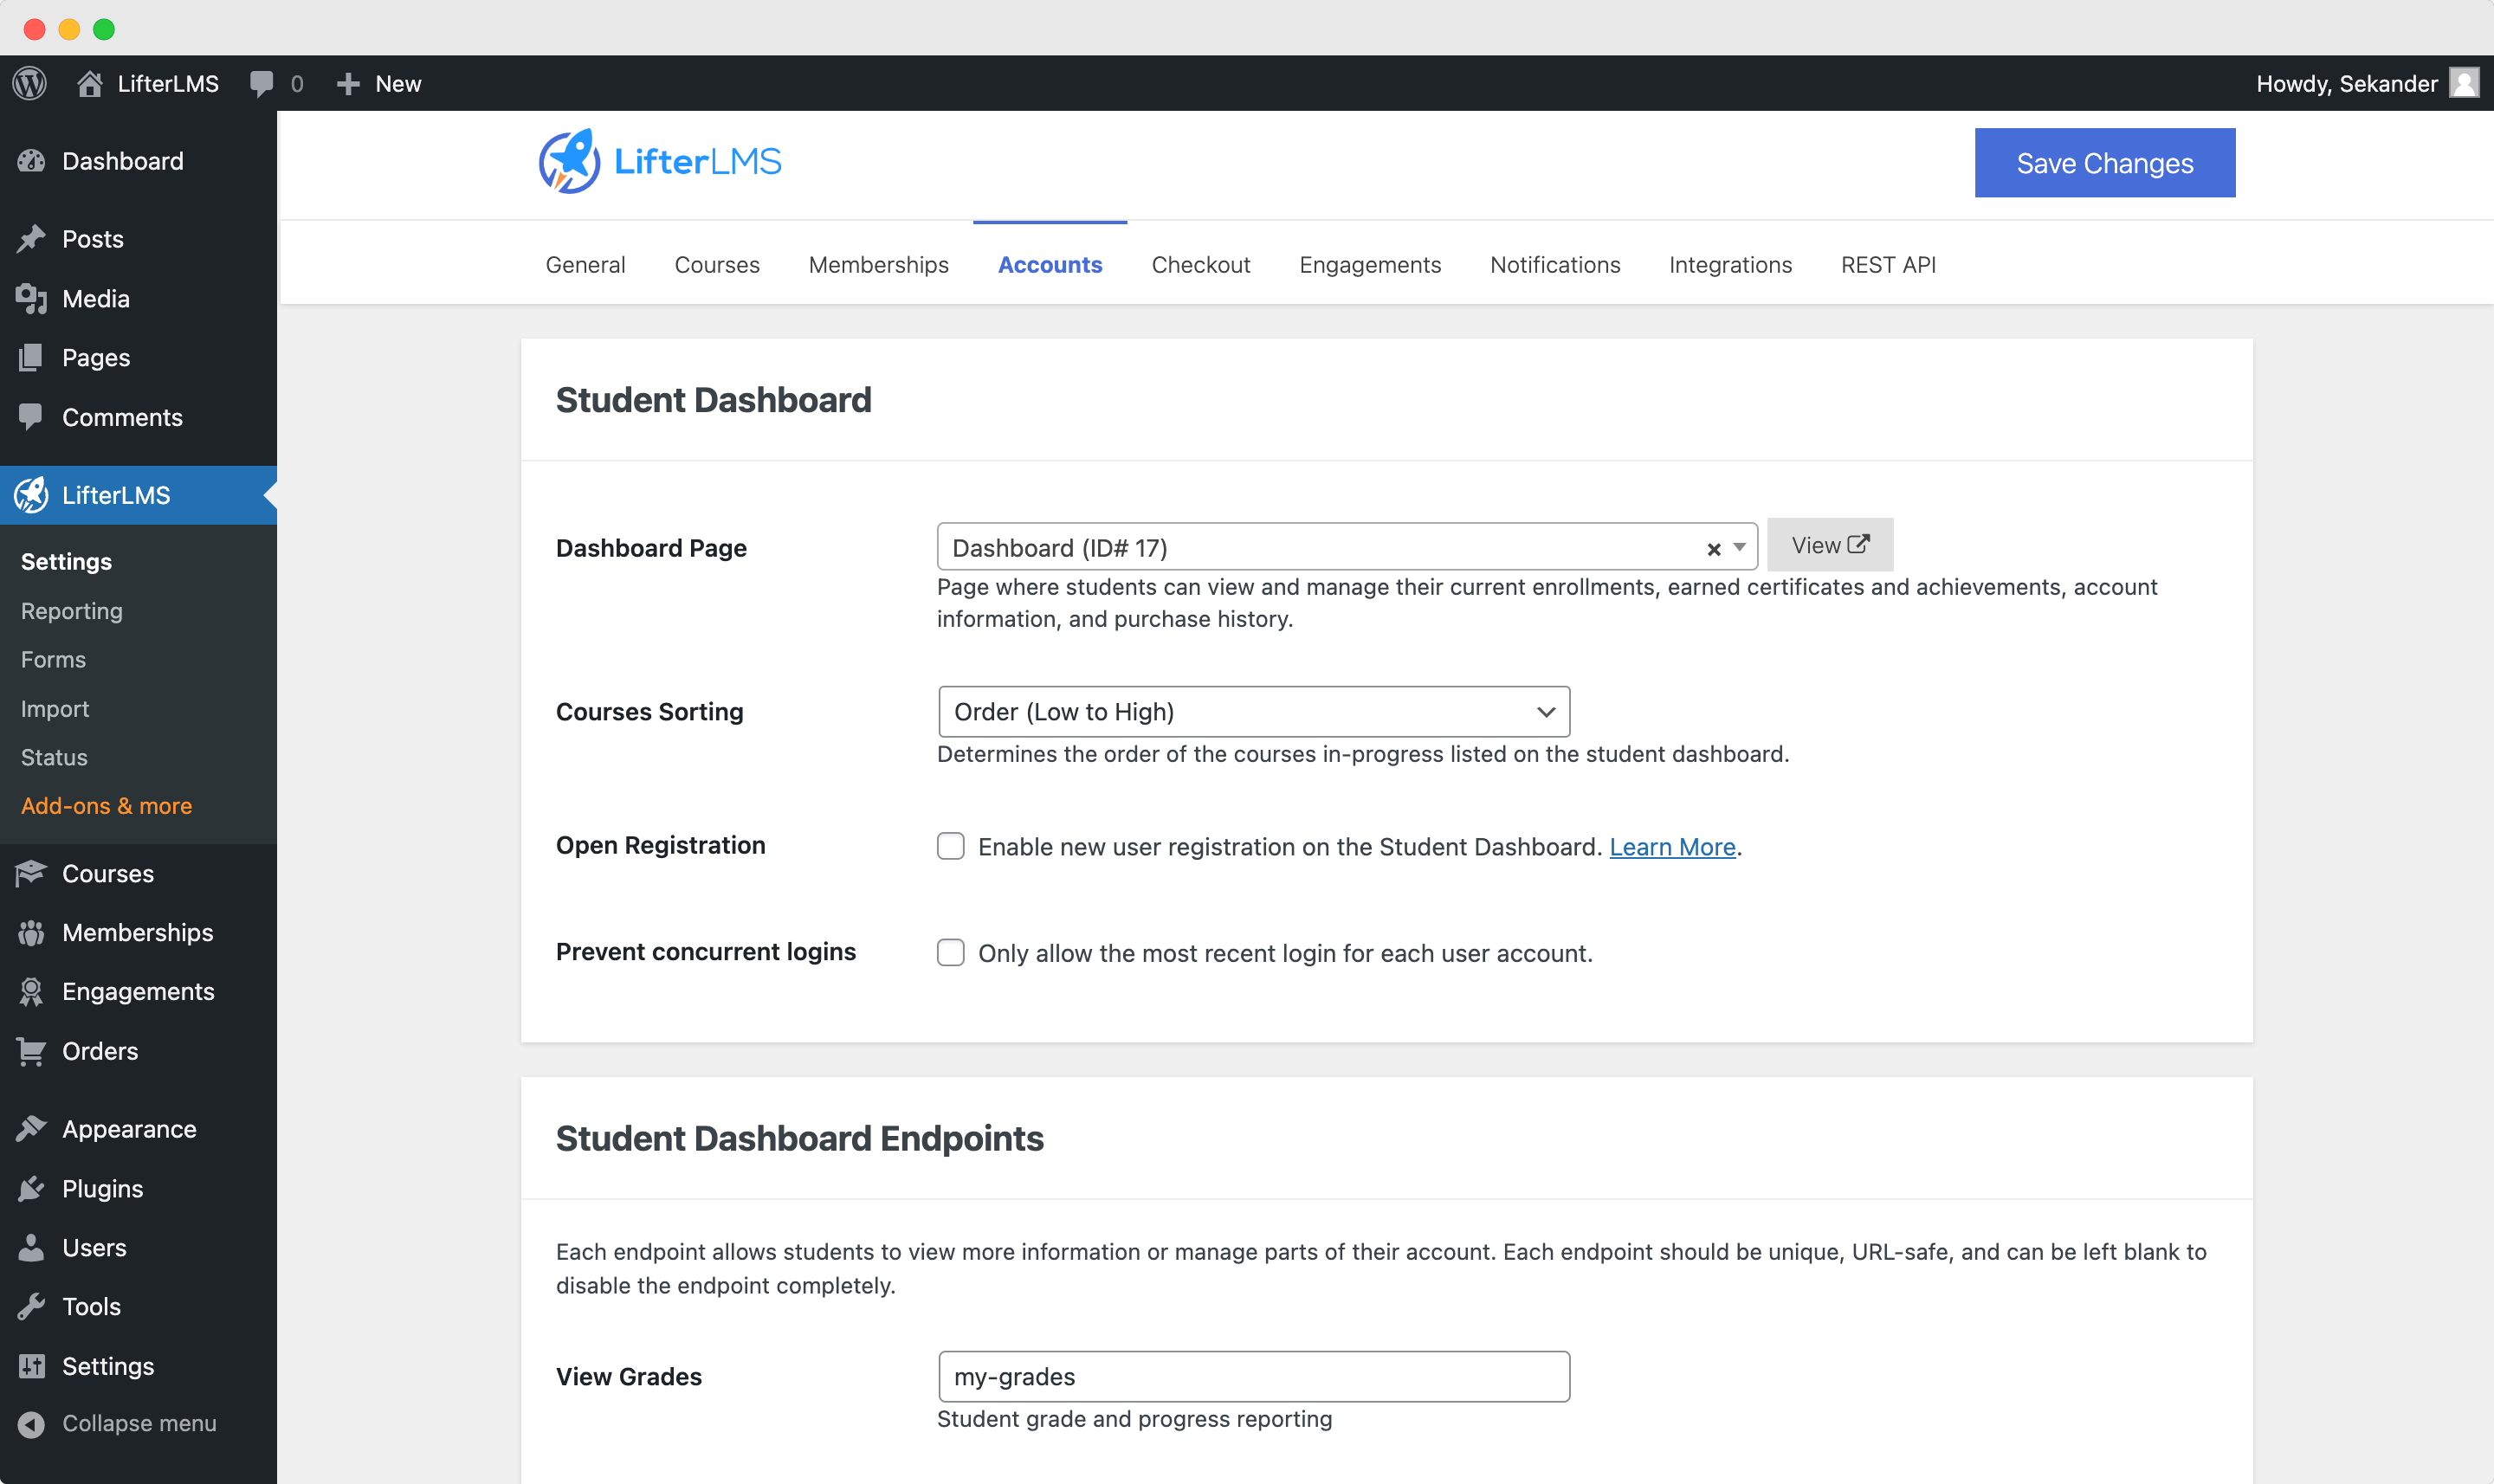
But not only that, but you can also add a degree of data privacy within your website with full disclosure. So, lower in the accounts tab, you will find options to add terms and conditions and privacy policy.
The best thing is that you can even configure LifterLMS to erase all student data and turn on an anonymized billing system. Now how many LMS platforms can do that?
Checkout & Billing Configuration
Apart from courses, the billing part is the most crucial experience for you to enhance for the students. It gives the impression of your platform’s standards.
From the checkout page, the features become more robust and segmented. You will notice an additional layer of tabs under the top tab. These are for all the payment gateways and methods you are adding. For basics, you can direct your checkout and confirmation pages, activate SSL for security (highly recommended), and what the system will do if the payment fails – because that is where things can go wrong in the experience.
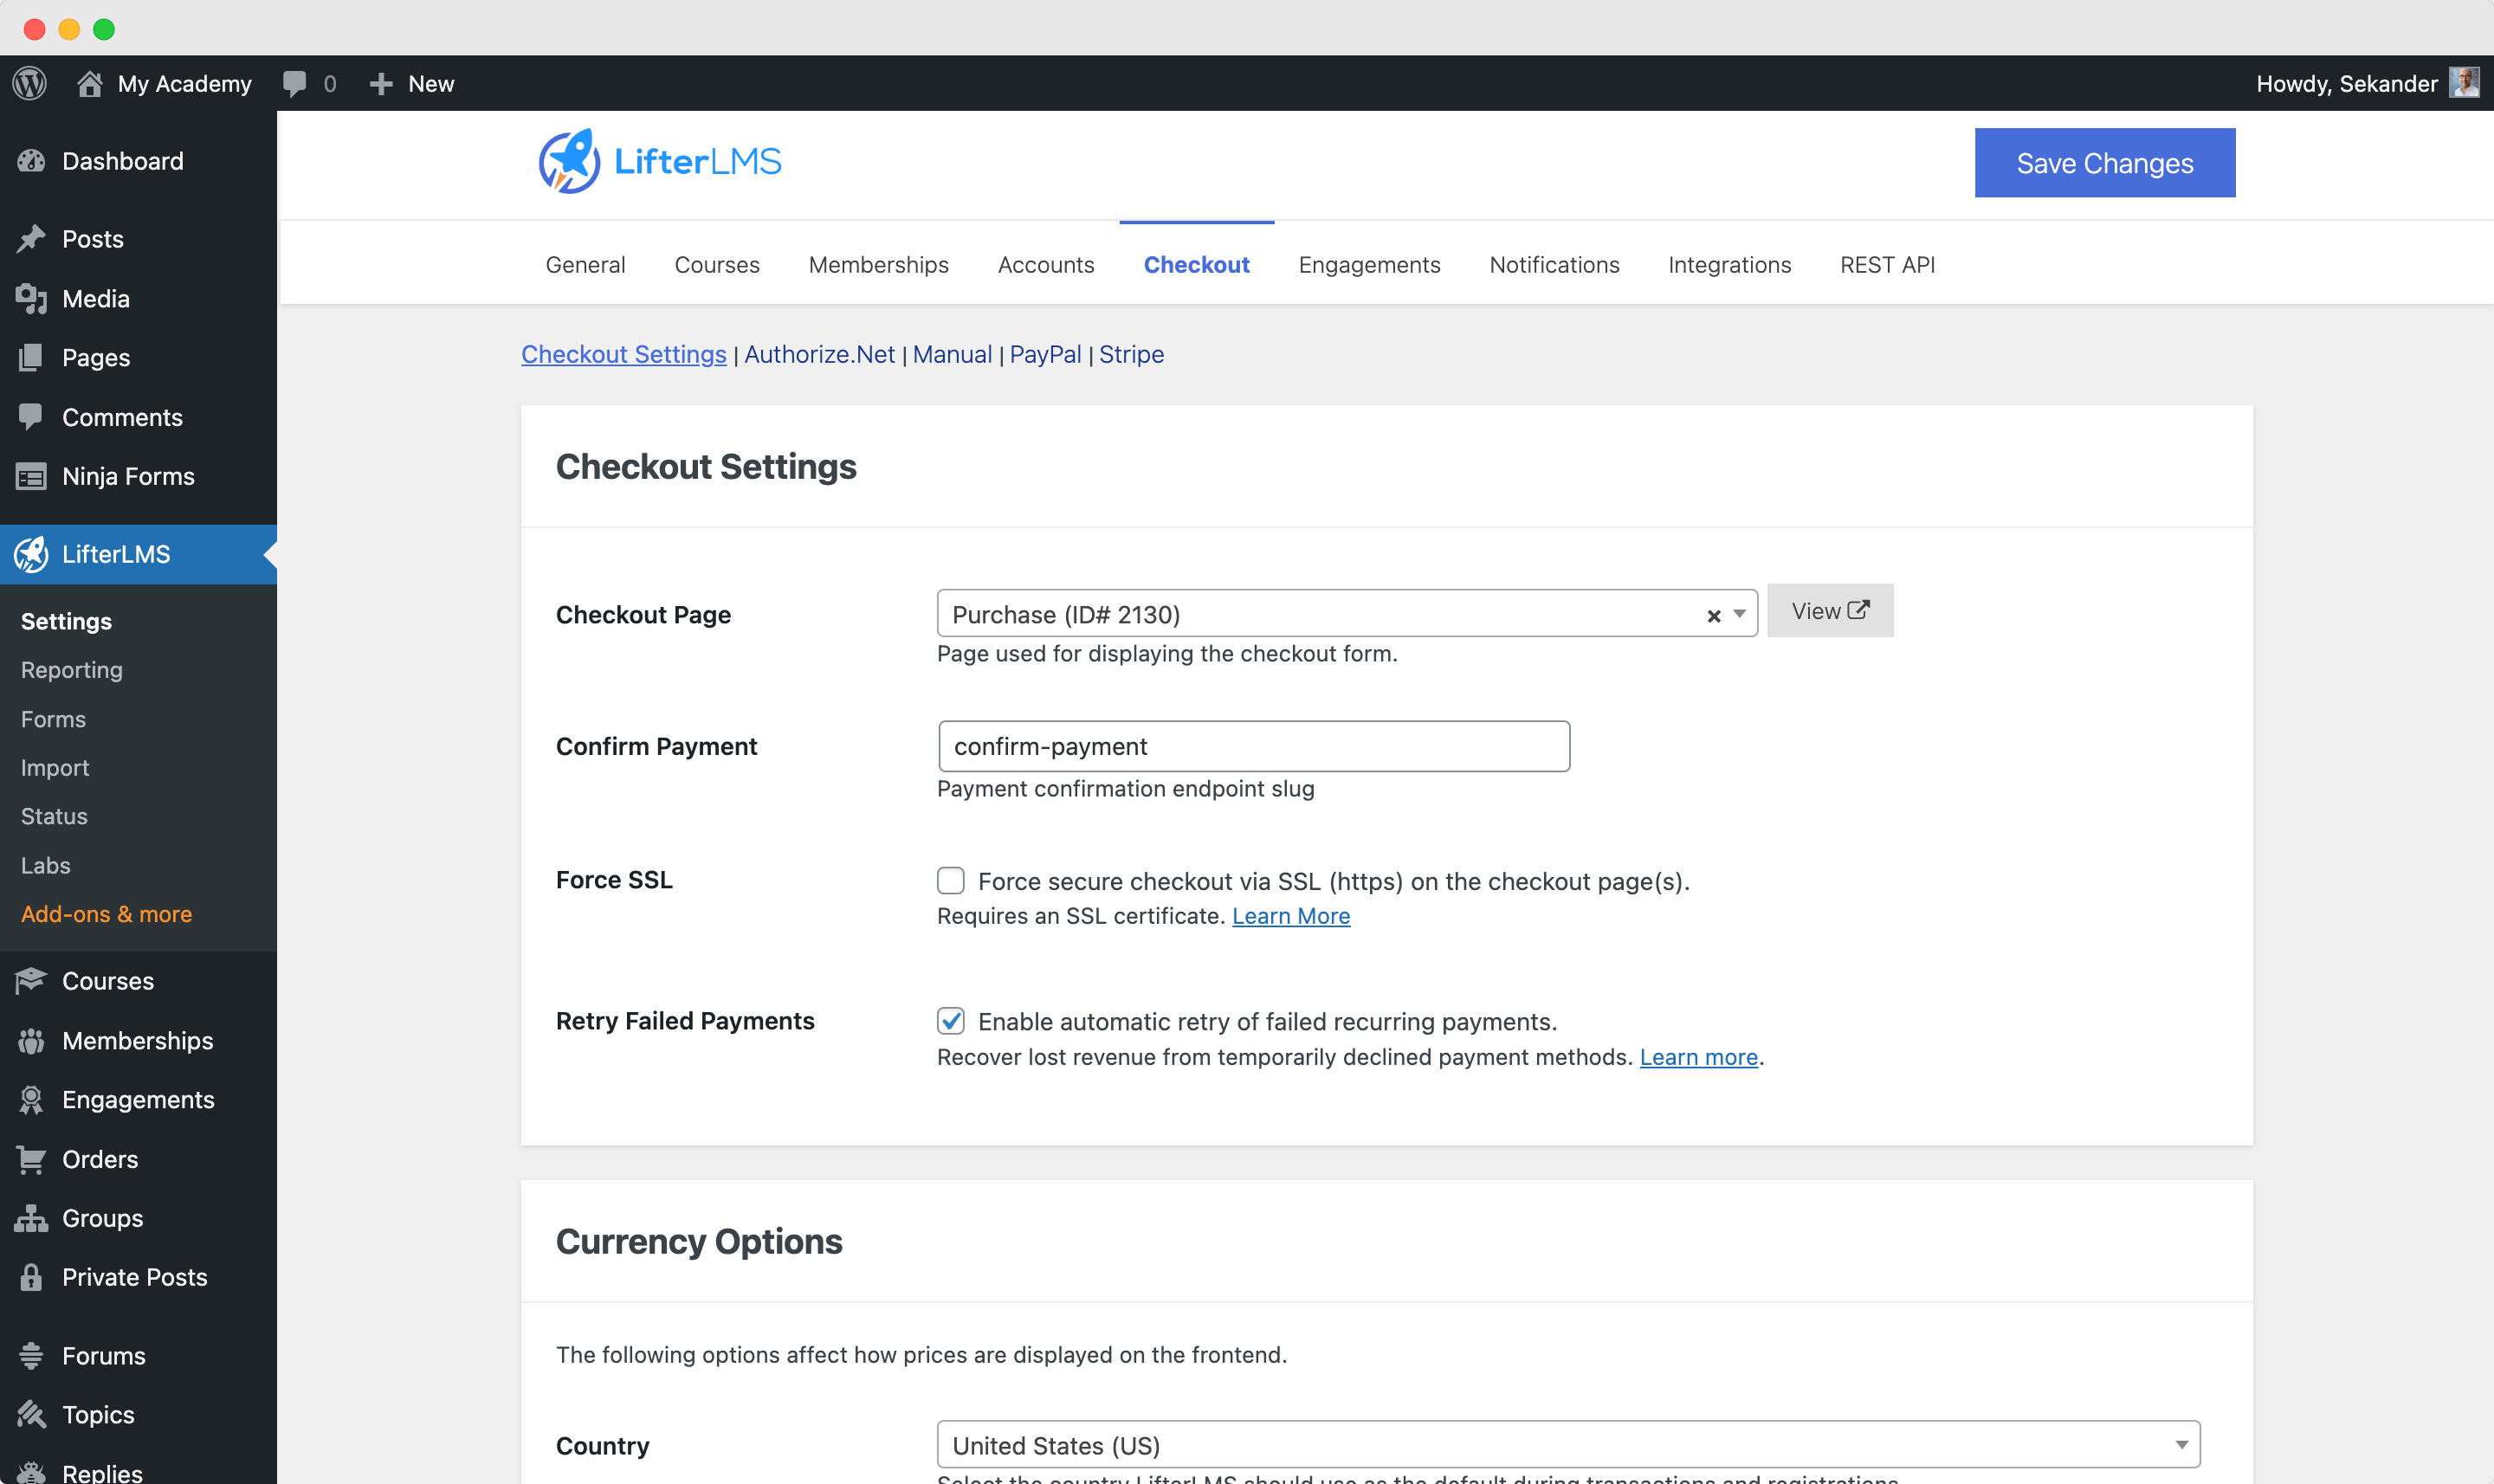
There are also basic currency settings; set them to the country and currency you think most of your learners will reside in.
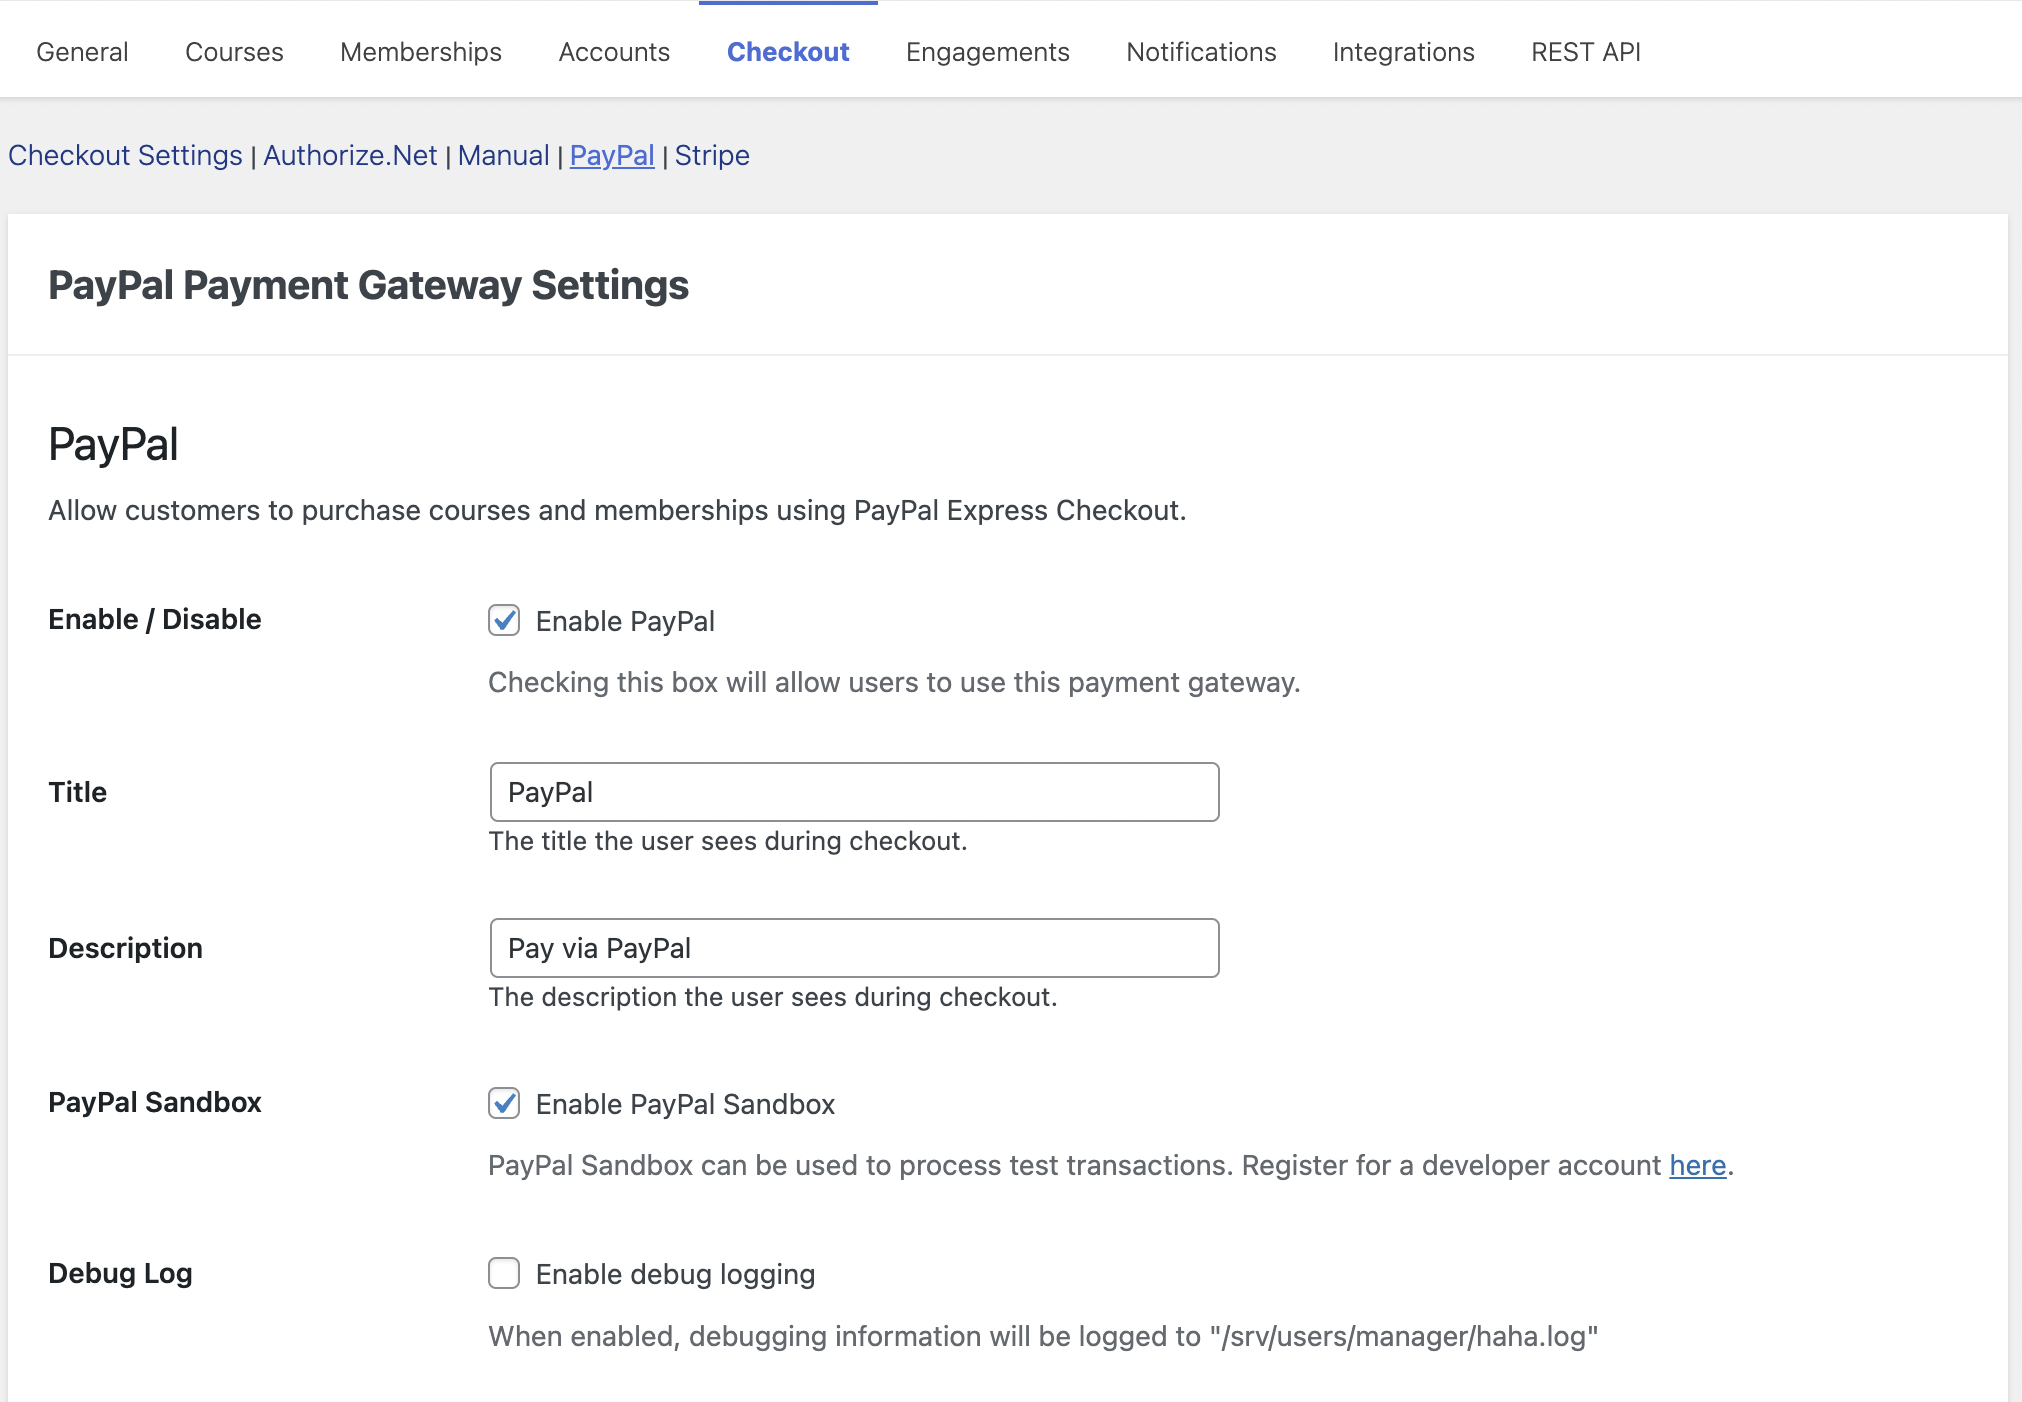
To give you a sneak peek, each payment gateway has its own settings page accessed by clicking on the second layer of the tab.
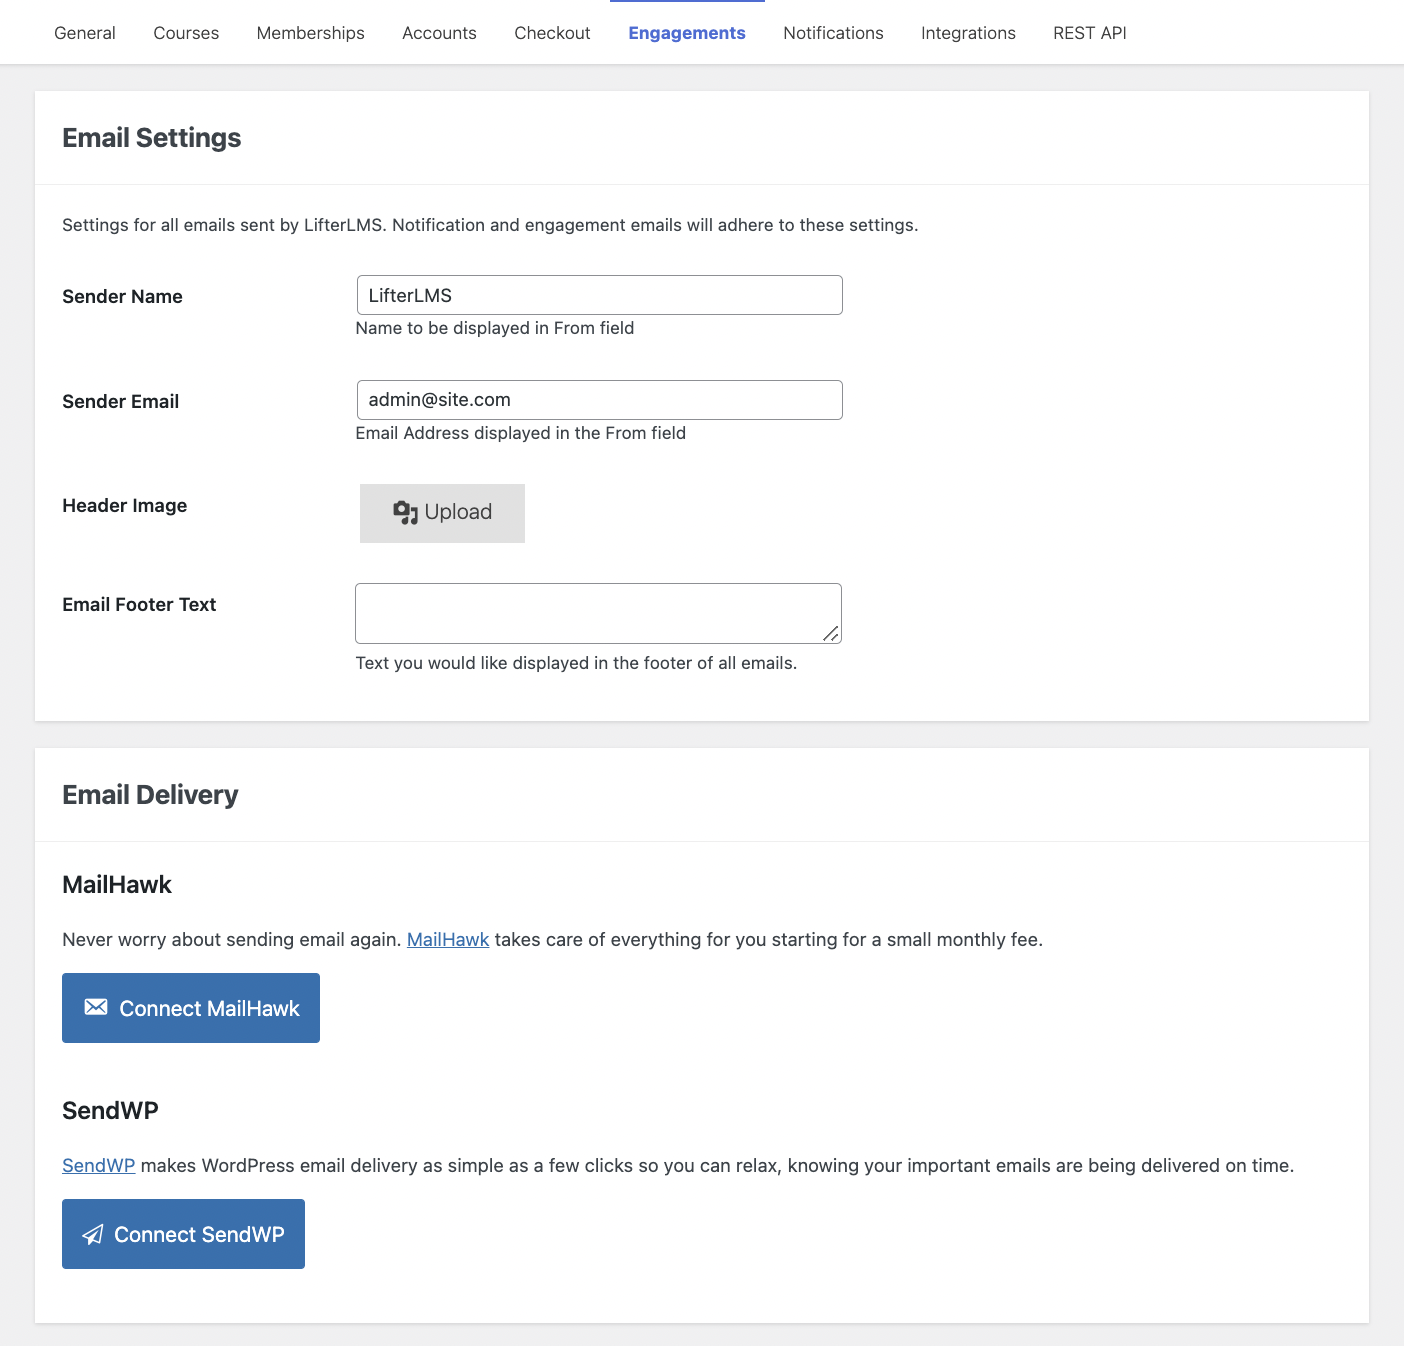
Configuring the Email Delivery Settings
Keeping your students engaged, informing them about new courses, and sharing helpful updates and resources can increase the retention of your LMS platform. LifterLMS breaks it into two parts. Email and notifications.
With a few clicks, LifterLMS can generate a fully customized email template. Then you can connect them with email delivery services like MailHawk or SendWP. By using add-ons, you can unlock even more mailing tools. It is straightforward to connect, you just need to copy the necessary API from the target server.
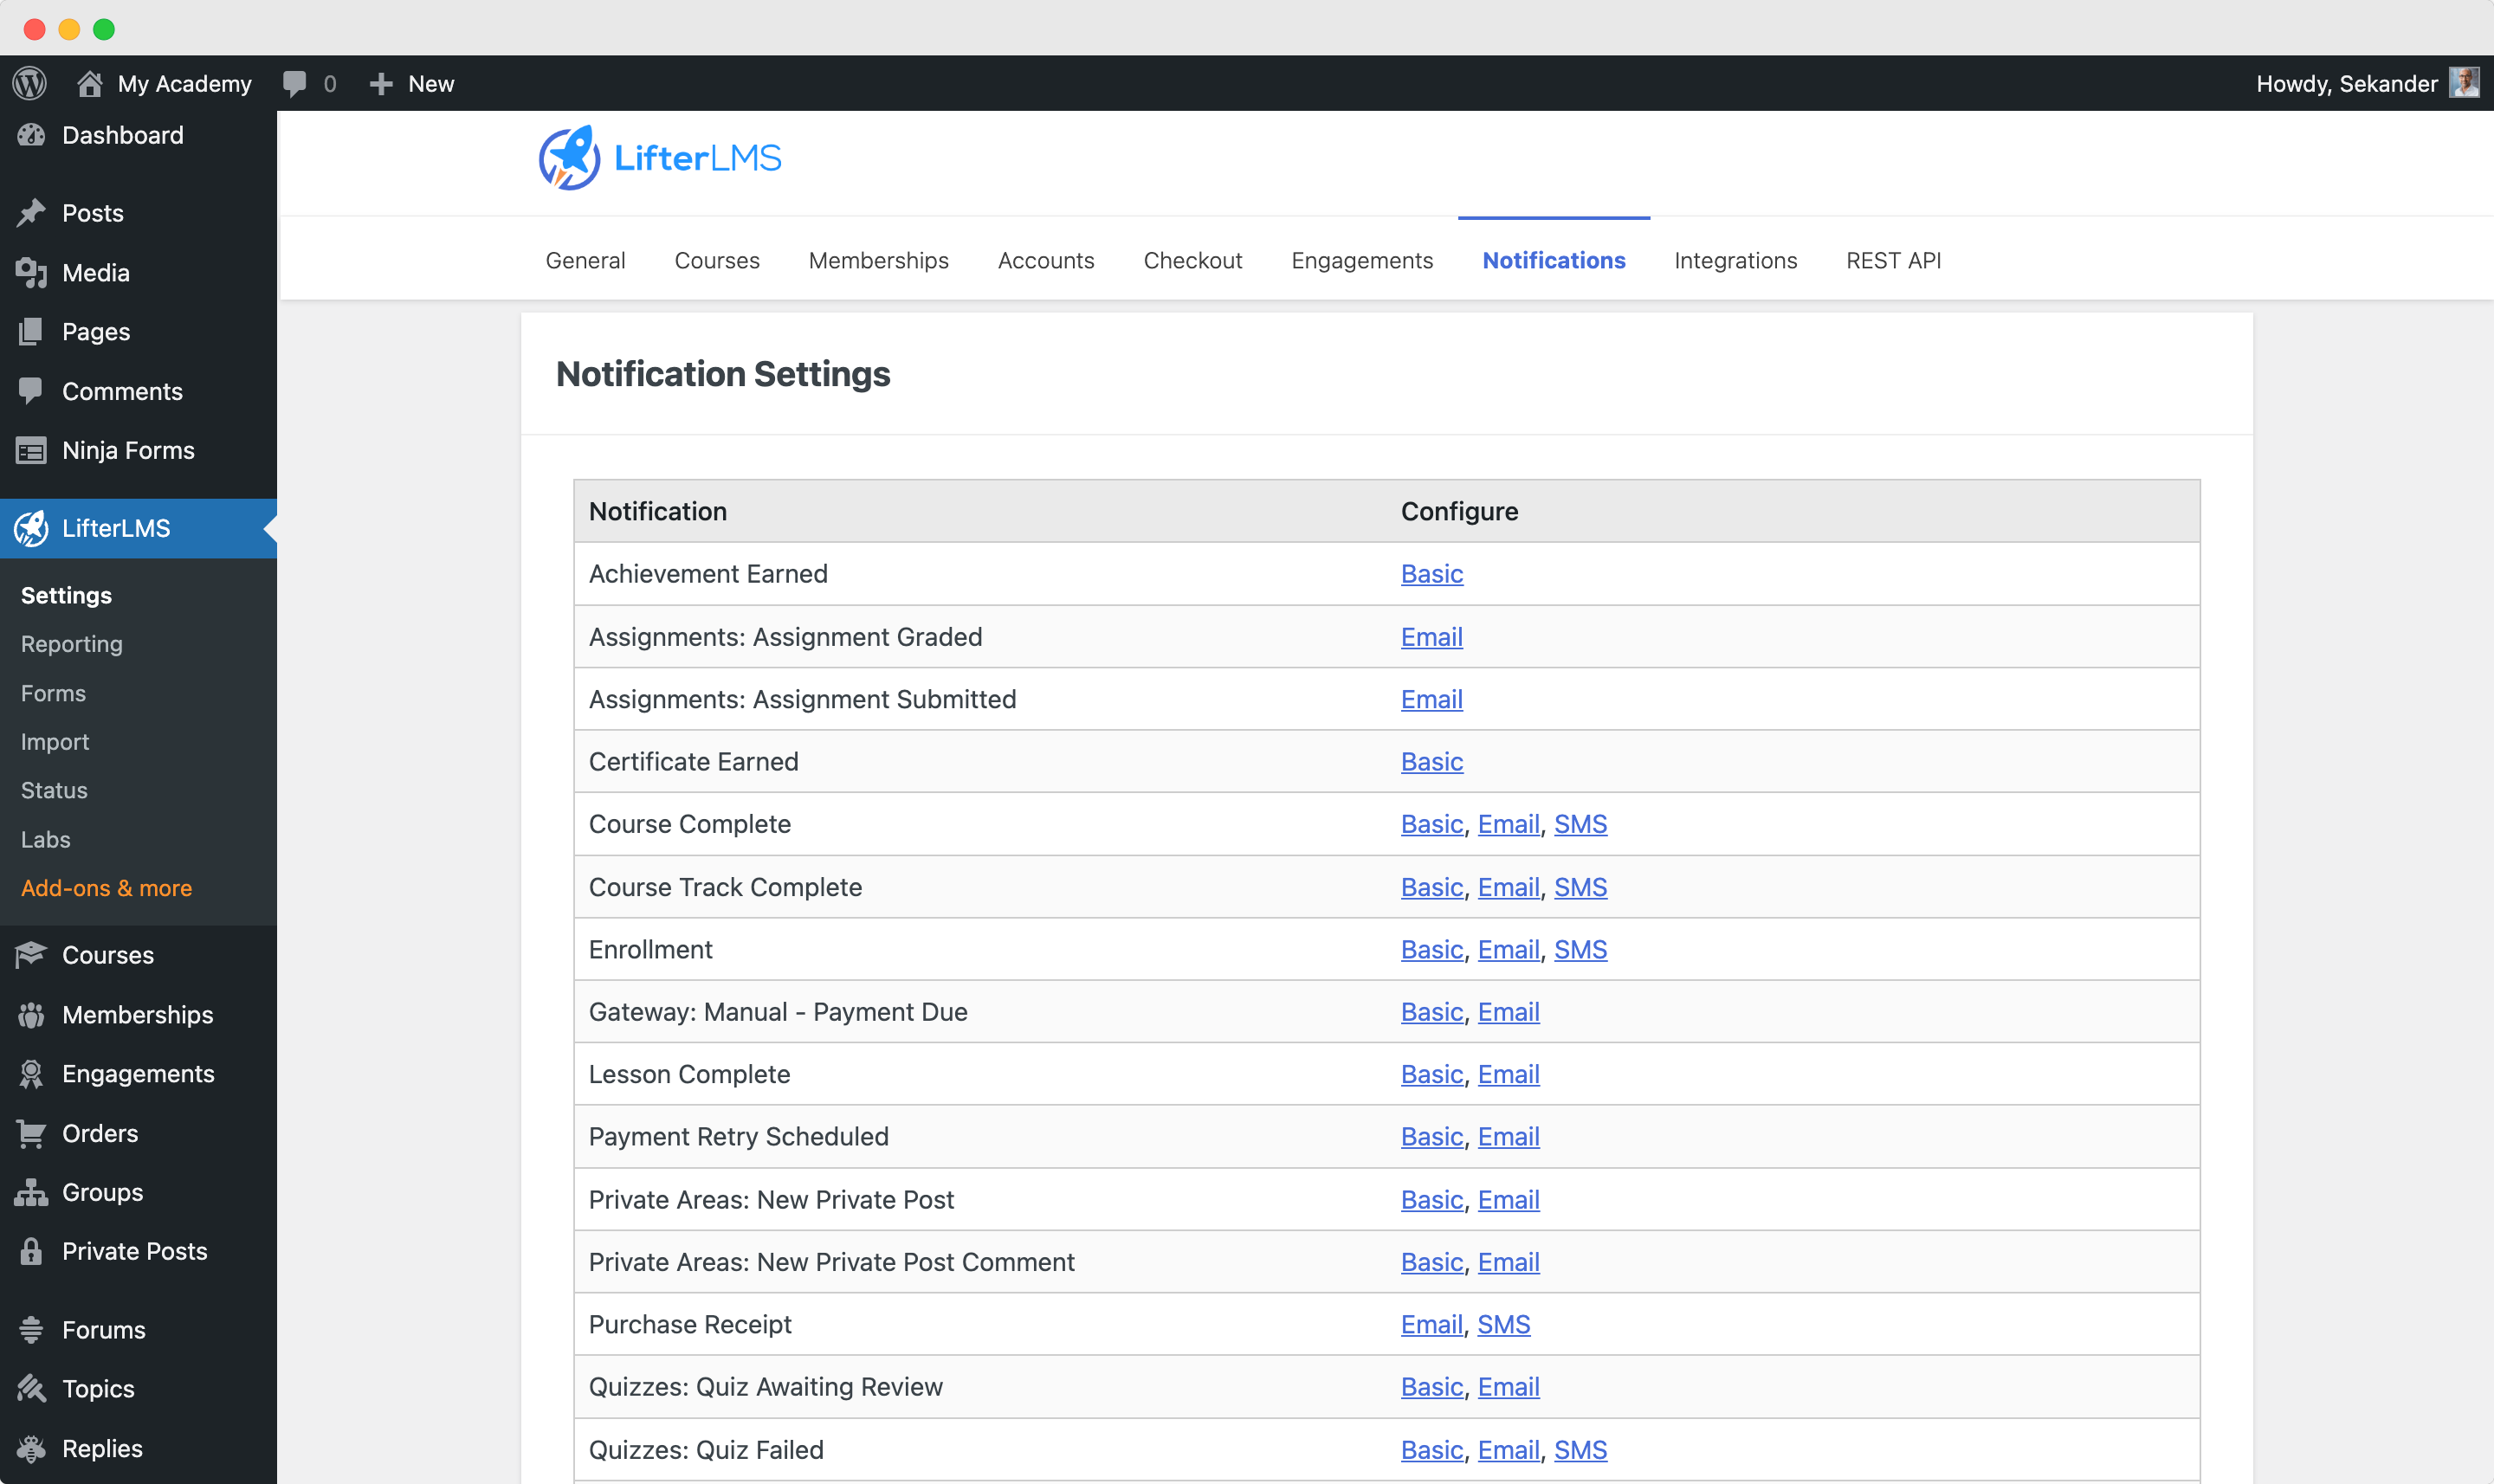
You can also configure your custom templates for achievements and certificates. You can configure notification messages and when to trigger them from the Notifications tab. Still, this placement may be very different from other plugins and require add-ons to activate.
We Are Almost Done!
These alone should be enough to get you started. But if you are scoping for a more advanced platform and want to bring in more good features from other tools, you will have to start integrating them. Not all LMS plugins have good integration support. But LifterLMS had quite a handful to test out for this demonstration. The most remarkable thing about LifterLMS is that we have a complete API feature ready to take on any challenges with integration and developing services. You can check out our podcasts to see how our users have been integrating advanced tools and solutions with LifterLMS to make the most unbelievable solutions for the global market!
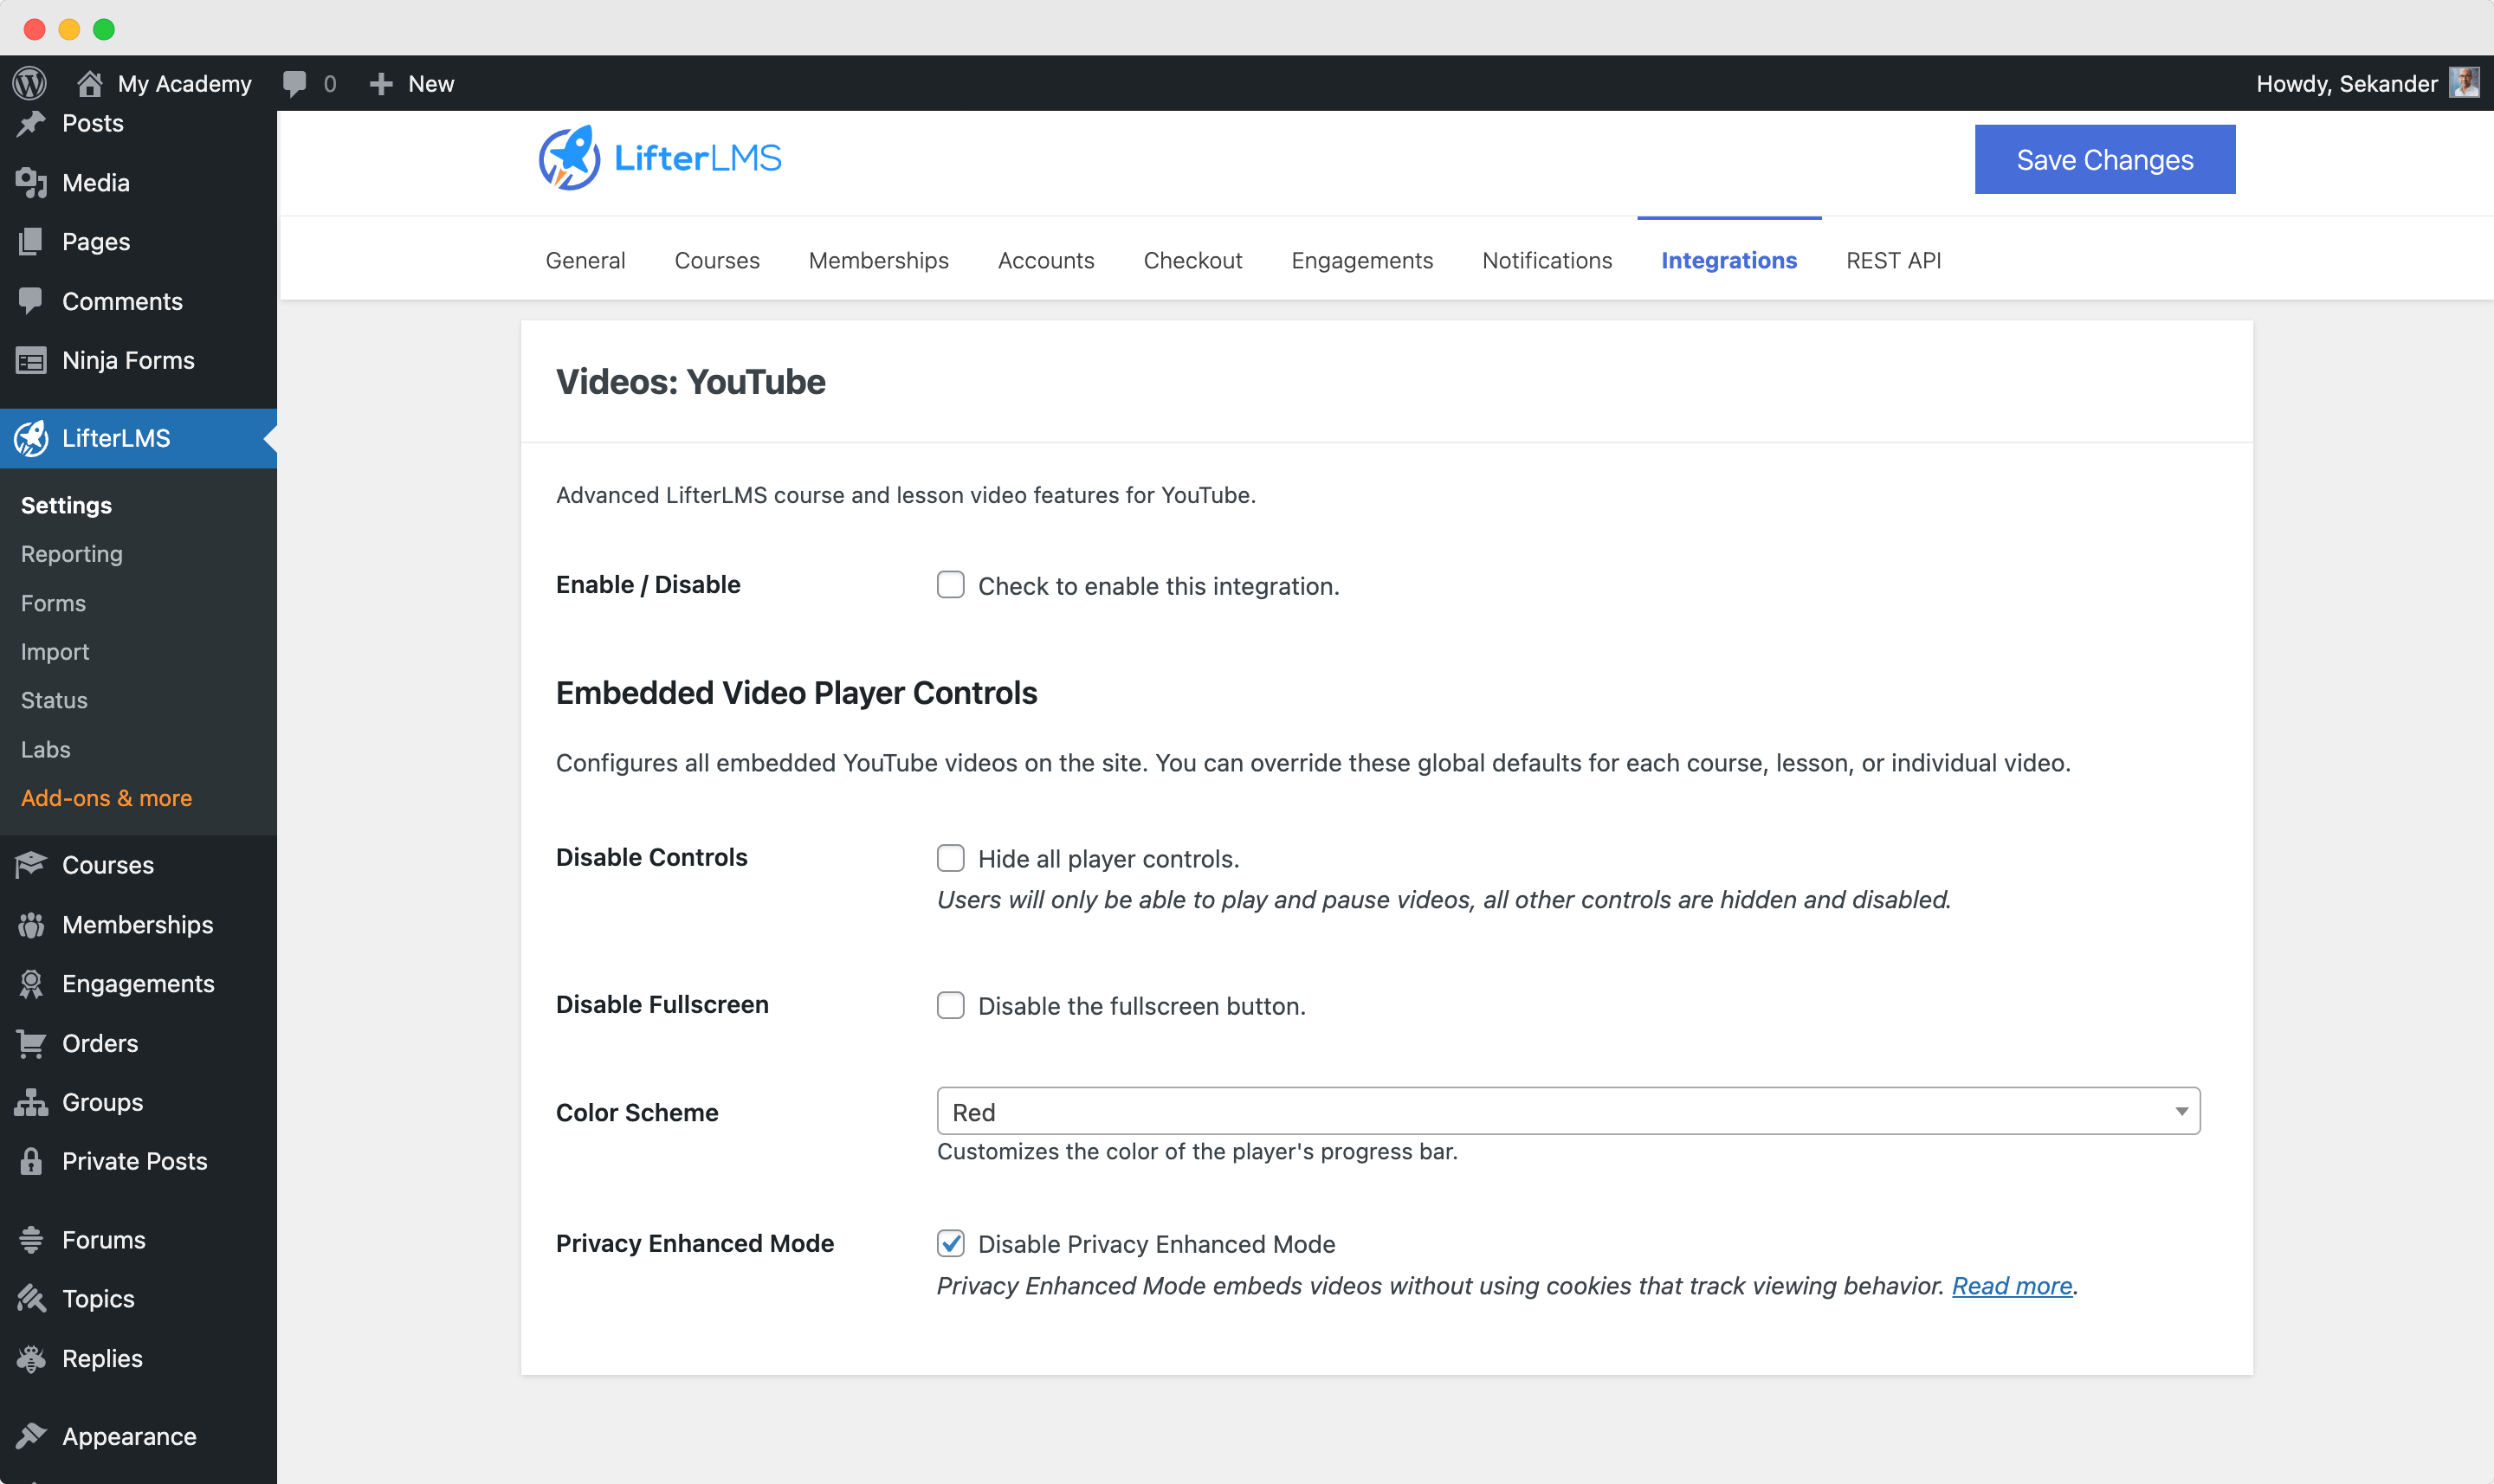
Integrating Powerful Tools Into Your LMS System
To activate an integration and configure it, you just need to access its detailed menu by clicking on the name and inputting the details.

We are showing the Youtube integration as the most used integration with LifterLMS. You can configure the color of the Youtube icon and the progress bar and disable the play, pause, and mute controls with a single click.
We hope that that sums up all the core settings you need to address in a step-by-step LMS configuration tutorial. We are just a message away if you want to learn more about other configurations. Cheers!