Using the Course Builder
The LifterLMS Builder allows you to manage the structure and outline of your courses.
From the course builder you can create new sections and lessons, manage their order, and edit their titles. You can also delete lessons and sections from the course builder.
The builder was added in LifterLMS 3.13.0 and replaced the “Course Outline” metabox found on the course editing screen in all previous versions of LifterLMS.
You can get to the builder from three different places on the admin panel.
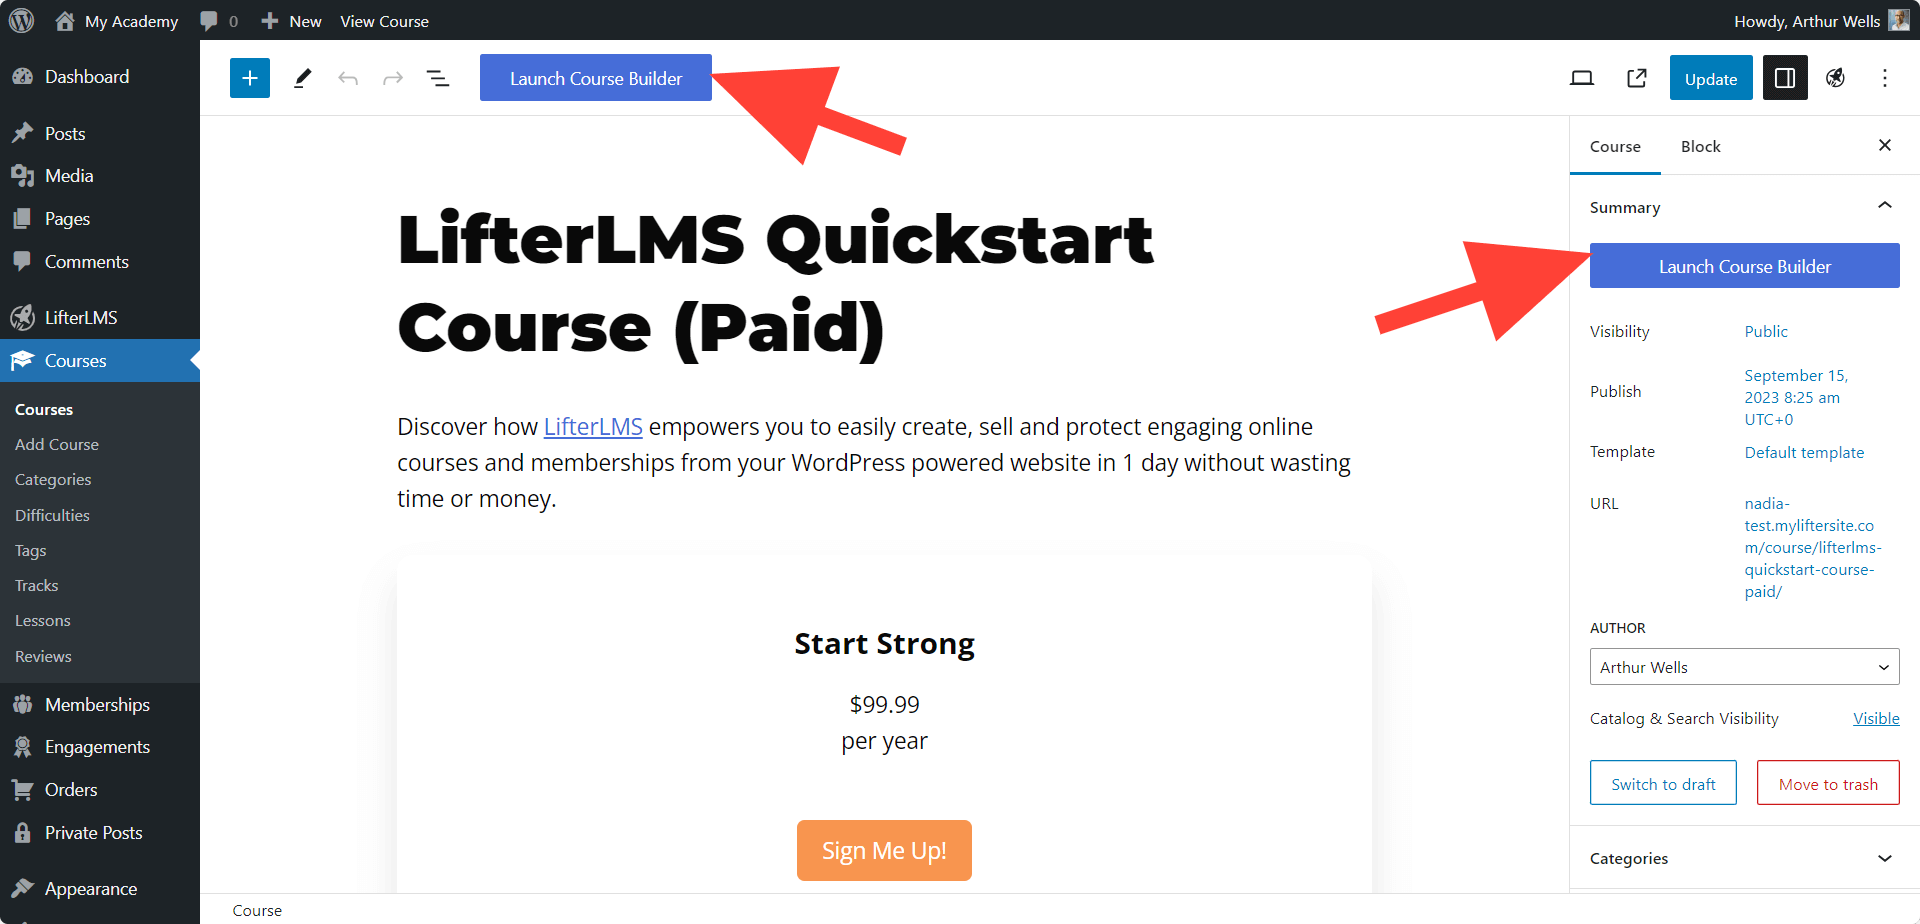
- From the course editor screen. Locate the “Course Builder” metabox on the right side of the screen. Click the “Launch Course Builder” button.
- Also from the top.
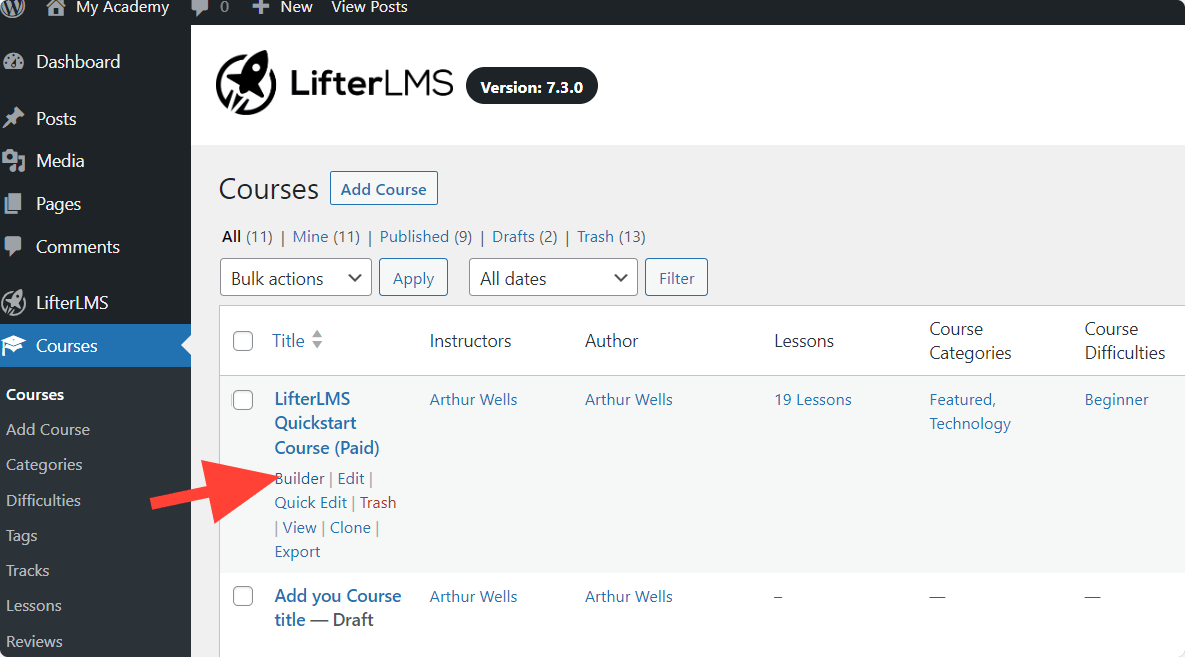
- From the course’s list screen. Hover over the title of a course and click the “Builder” link from the displayed actions list.
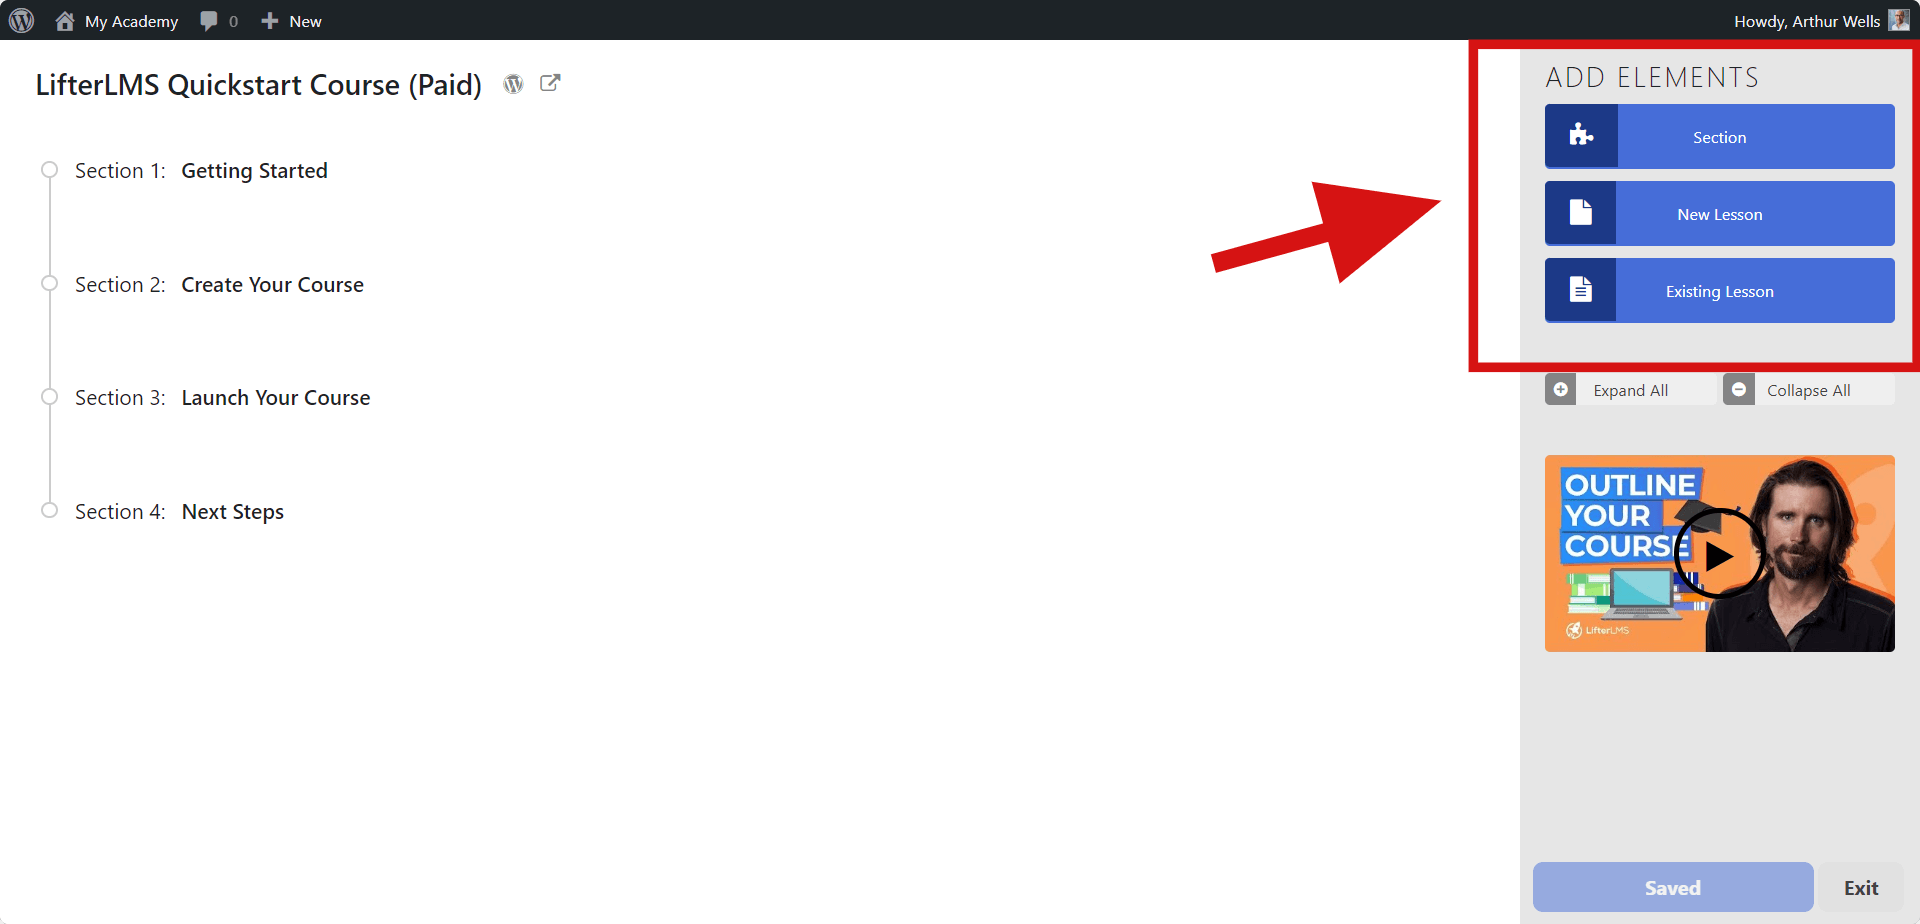
Sections, the building block of a course, are created and managed only from within the builder.
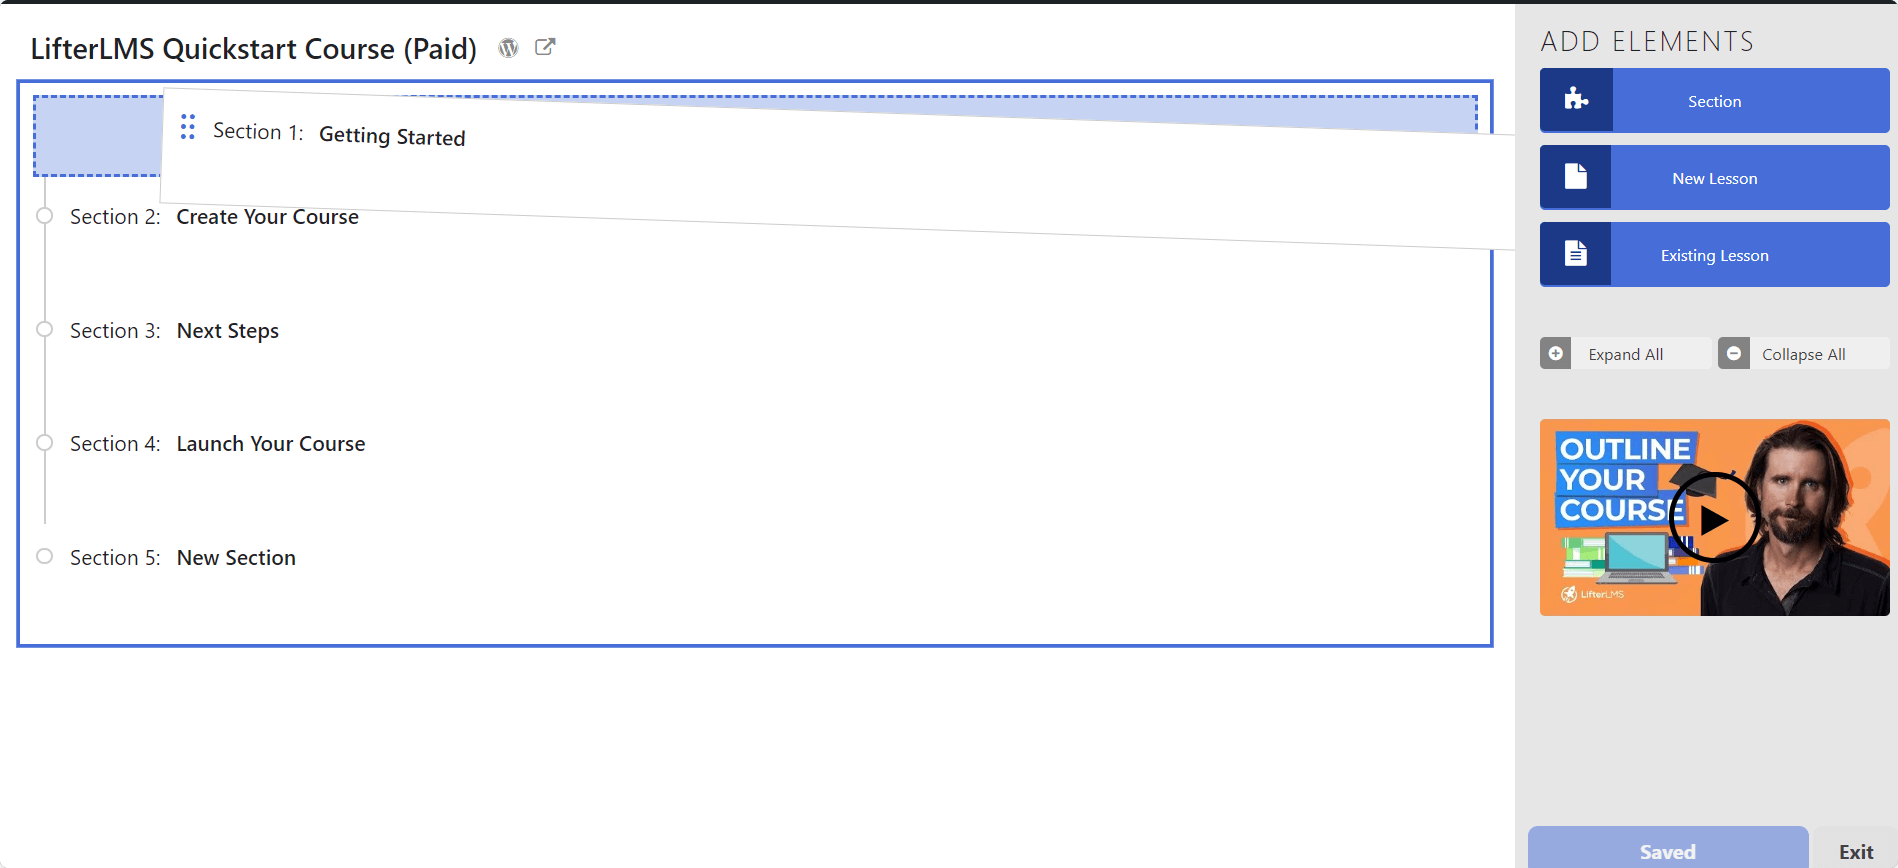
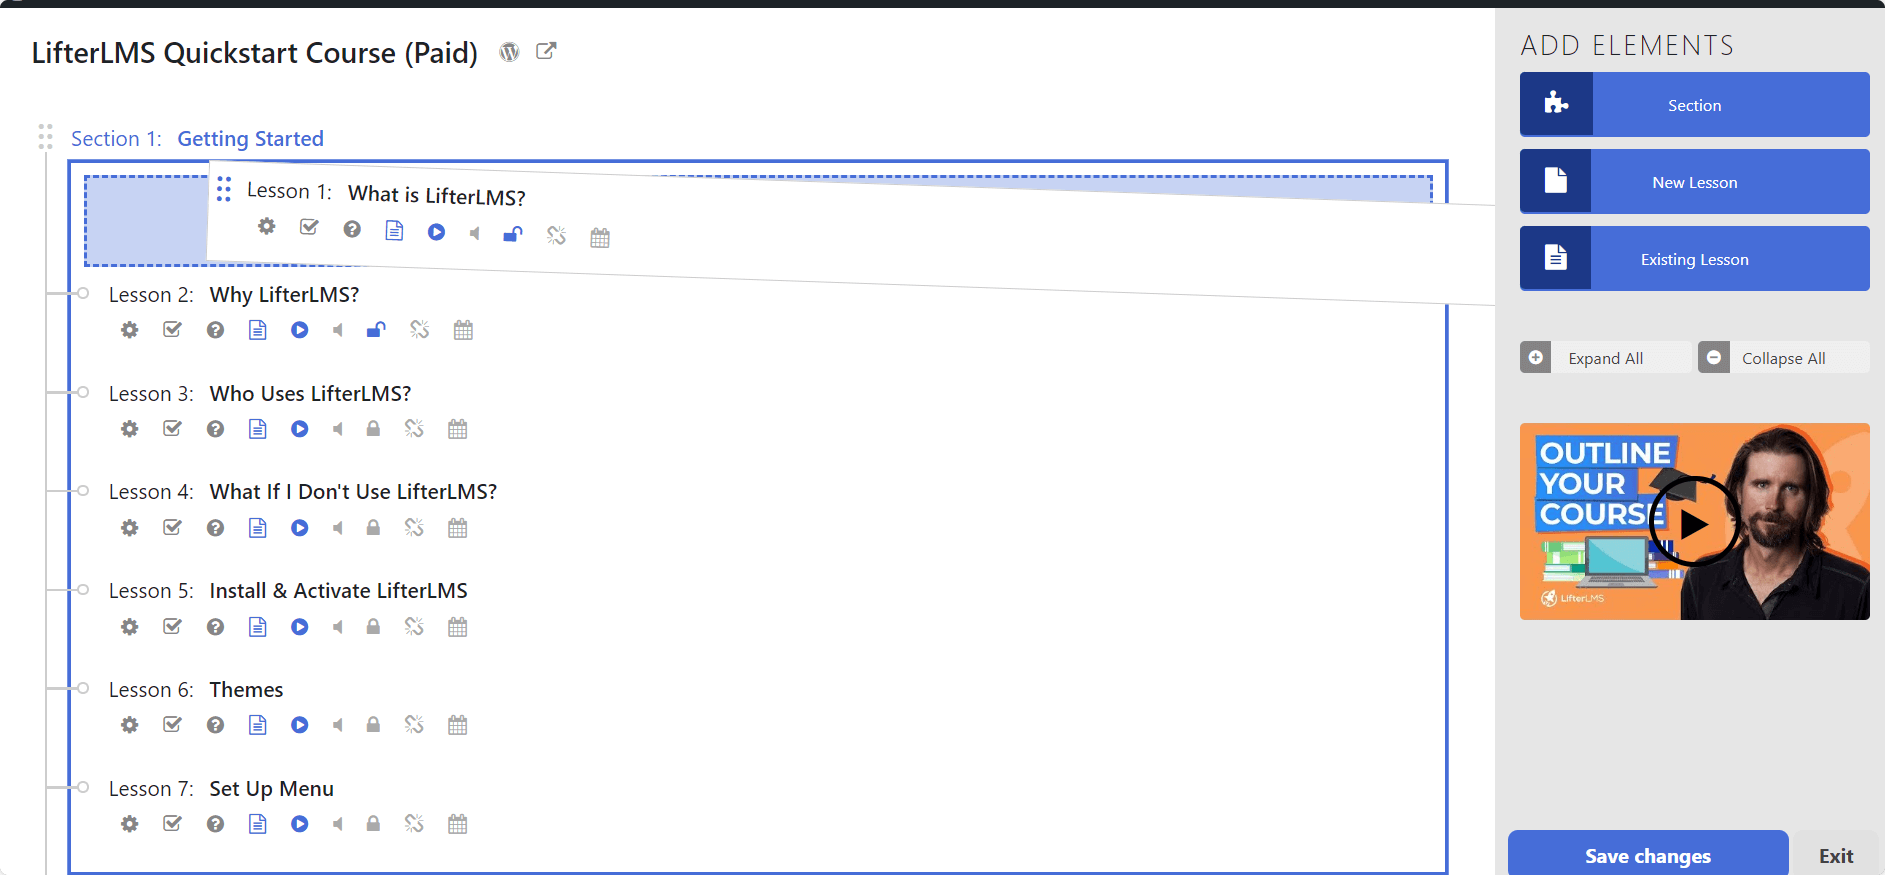
To create a new section you can click the “Section” button under “Add Elements”
A new section added via clicking will be automatically added to the end of the course.
A new section may also be dragged into the main course builder area and dropped into the highlighted blue drop-zone.
Lessons hold the main content of your course and can be added to the course via the builder just like a section.
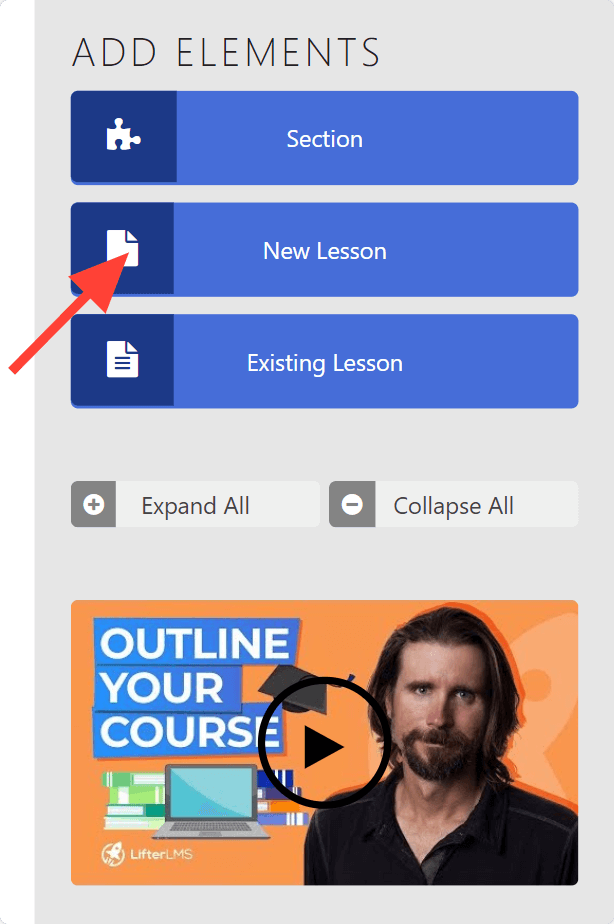
To create a new lesson you can click the “Lesson” button under “Course Elements”
A new lesson added via clicking will be automatically added to the end of the currently active section or, if no sections are active, the end of the last section in the course. The active section is the section highlighted in blue. Click a section to activate it.
A new lesson may also be dragged into the main course builder area and dropped into any section, highlighted by the blue drop-zones.
To add lesson content, follow the steps below.
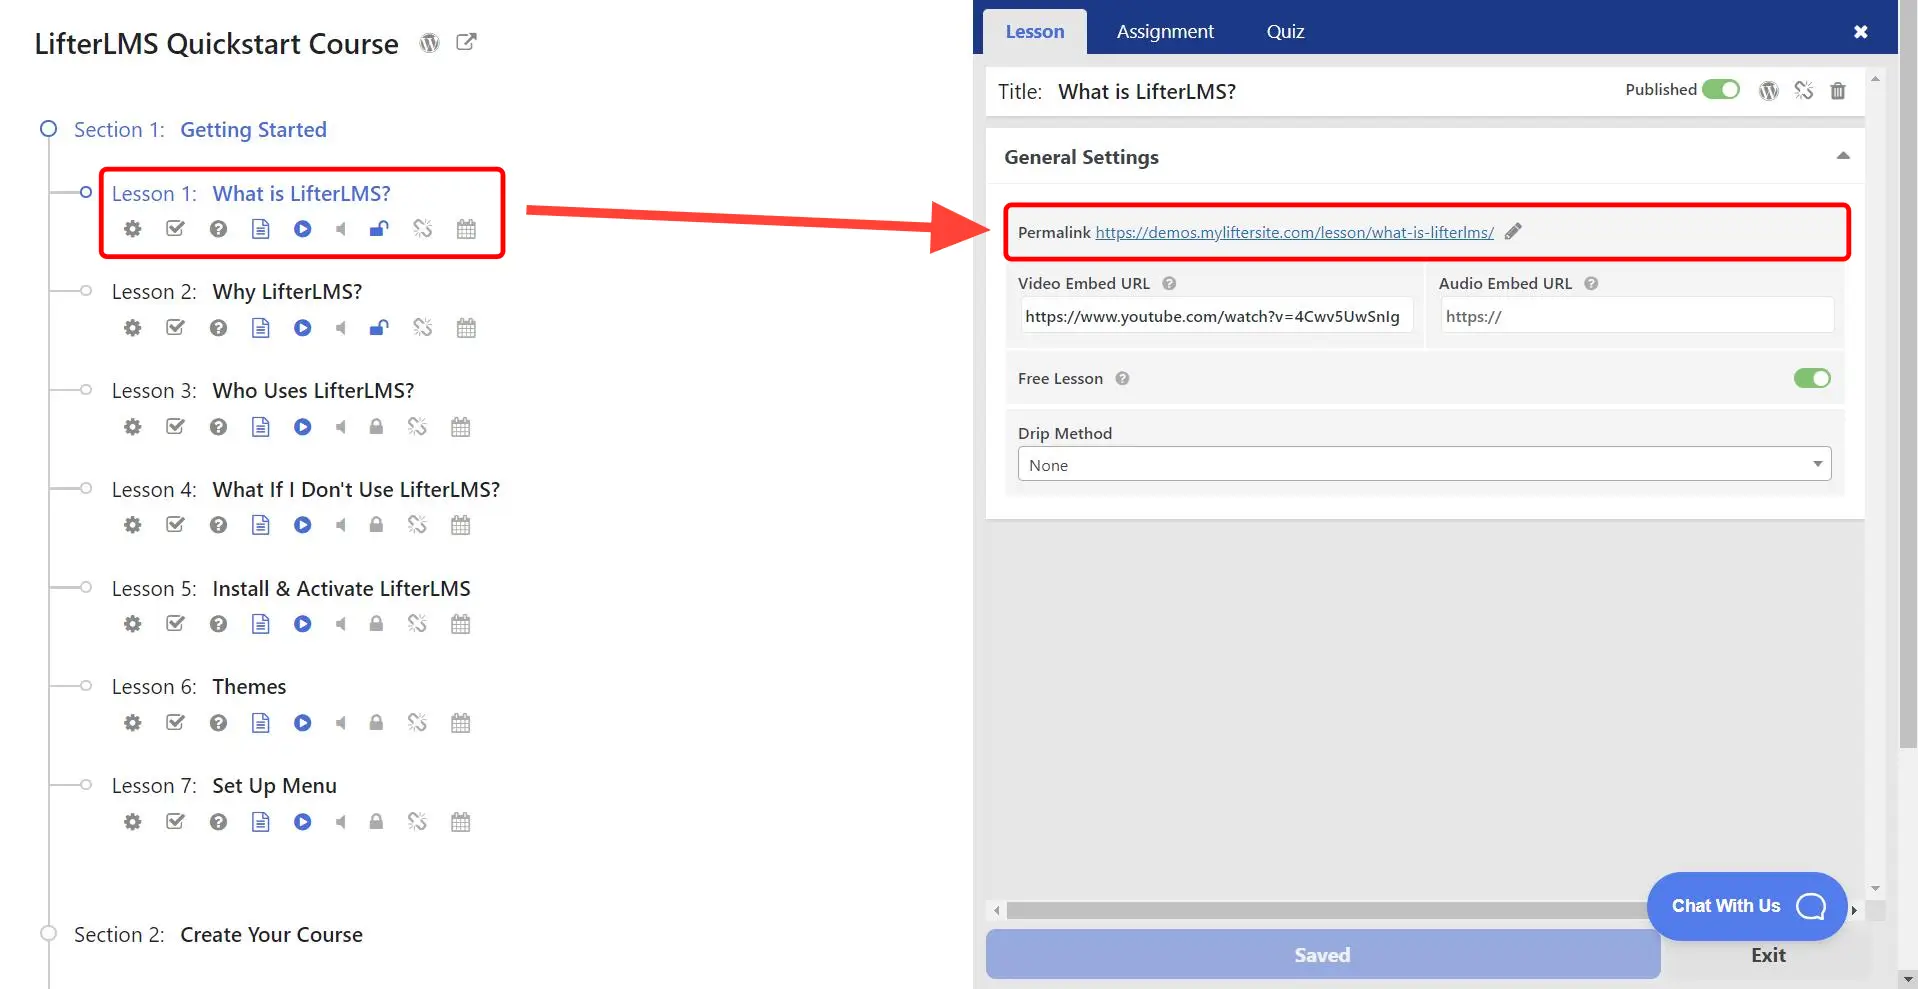
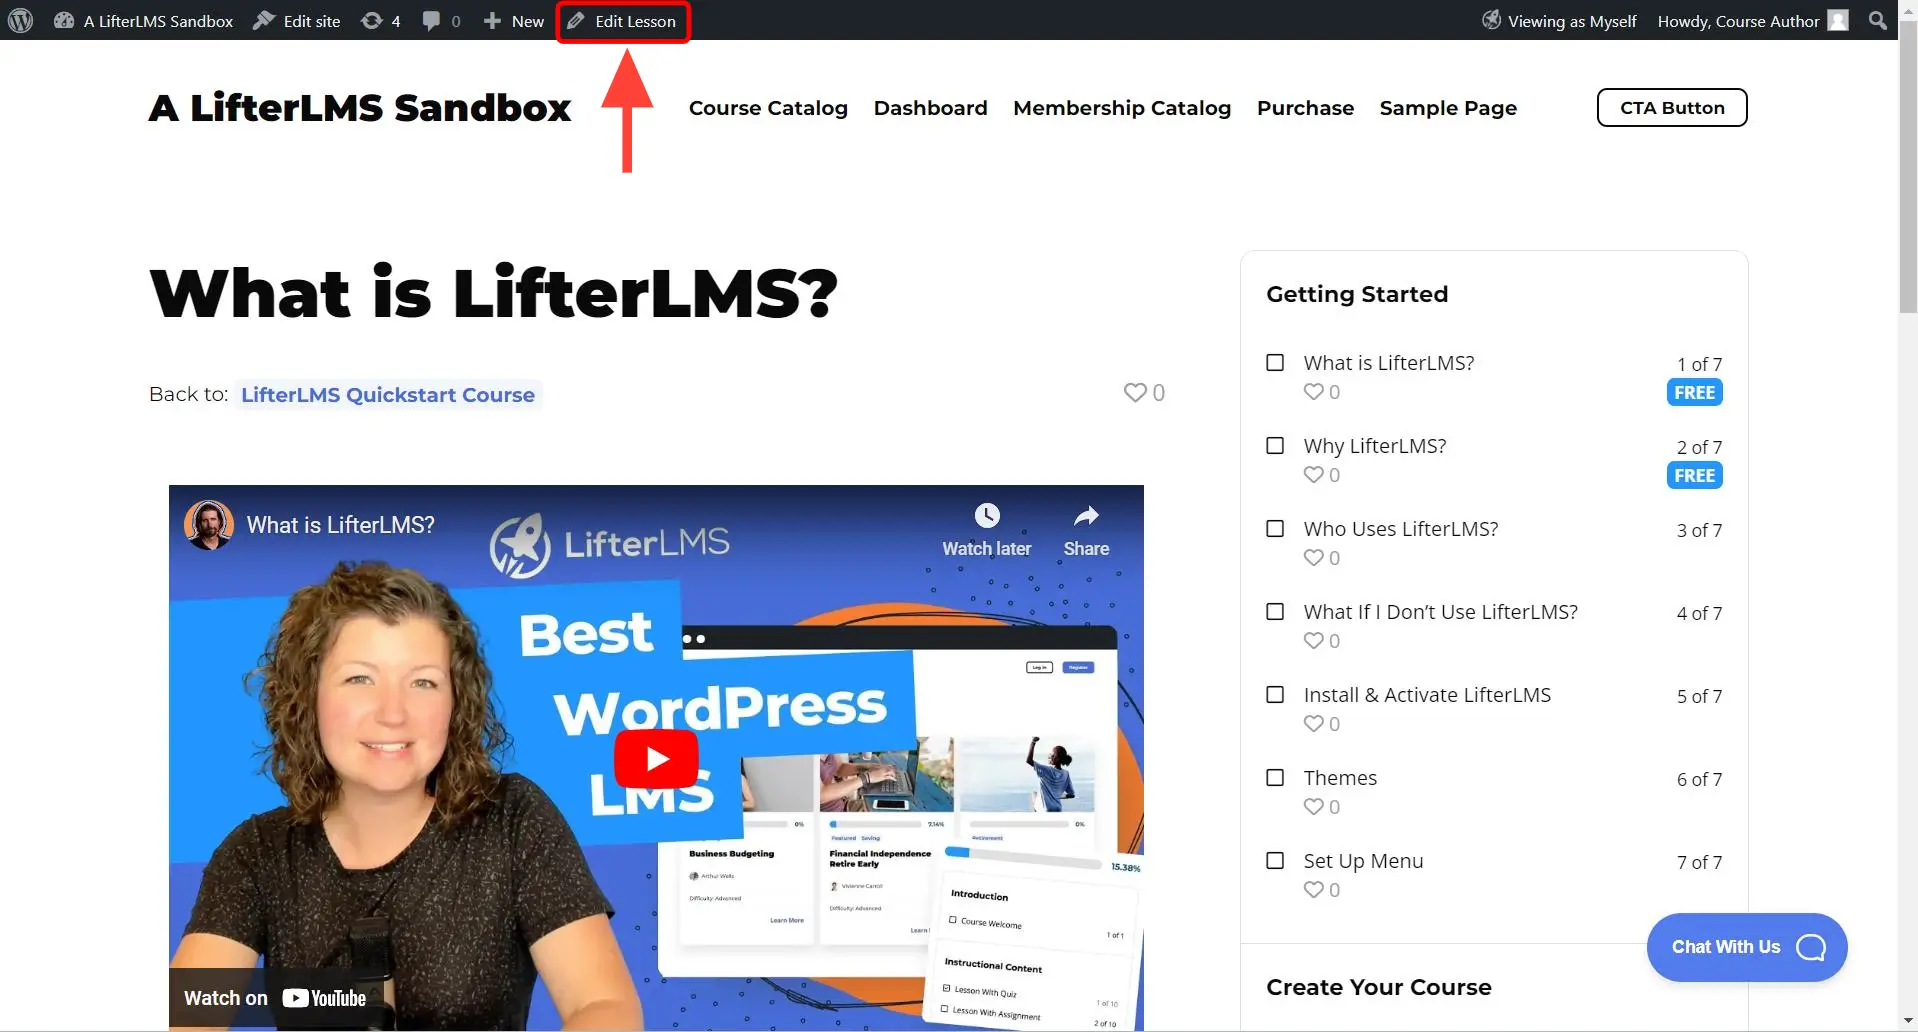
Step 1. Click on the Edit Lesson Settings gear icon.
![]()
Step 2. Click on the link in the Permalink field for that specific lesson.
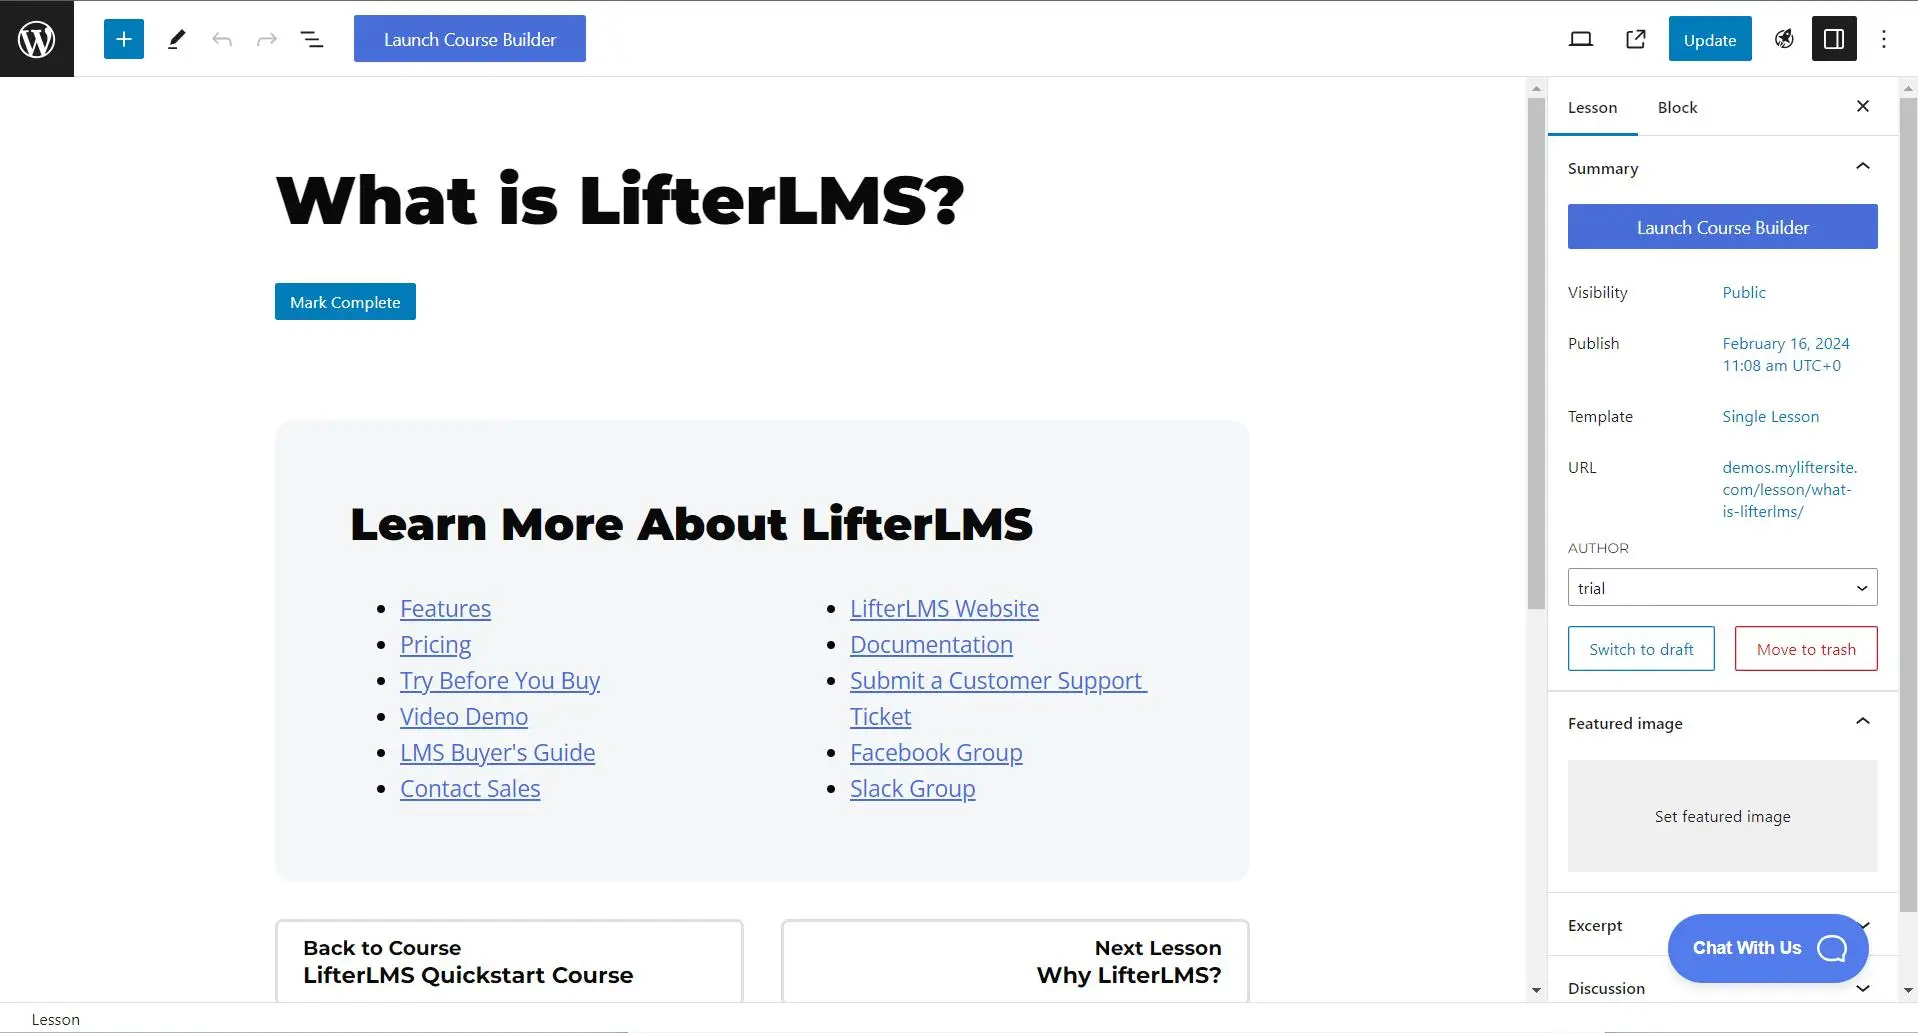
Step 3. This will load the lesson page on the front end. Click on the Edit Lesson button from the admin toolbar.
Step 4.This will load the lesson page in the block editor (Gutenberg).
Step 5.For an extensive introduction on how to add content to your lessons, watch the YouTube tutorial below.
To add and existing lesson you can click the “Lesson” button under “Course Elements”.
Upon selecting “Existing Lesson” you will be provided with a search bar where you can scroll through your pre-existing lessons or search for them by name.
From this list you can choose to “clone” a lesson or to attach an orphaned lesson.
The cloning option duplicates a lesson that is already attached to a different course.
The attach option will add an orphaned course, or a lesson that has been detached from another course.
Once you’ve located the lesson you wish to attach to the course, select it to add it to your course.
Assignments can be added to a lesson via the Builder, for information on creating assignments, see the assignment creation tutorial.
Quizzes can be added to a lesson via the Builder, for information on creating quizzes, see the quiz creation tutorial.
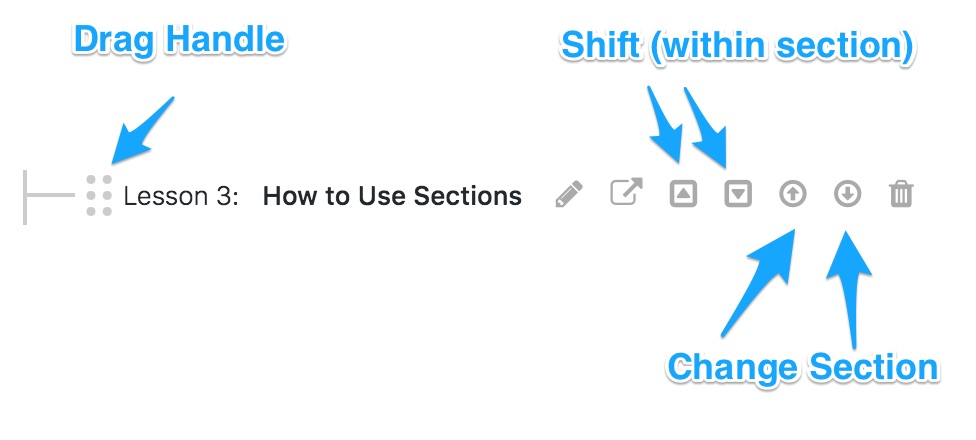
Both sections and lessons can be reordered within a course by using either the “shift” buttons or by grabbing them by their drag handles and dropping them into their new position.
Hover over a section or lesson title to reveal their drag handles and shift buttons.
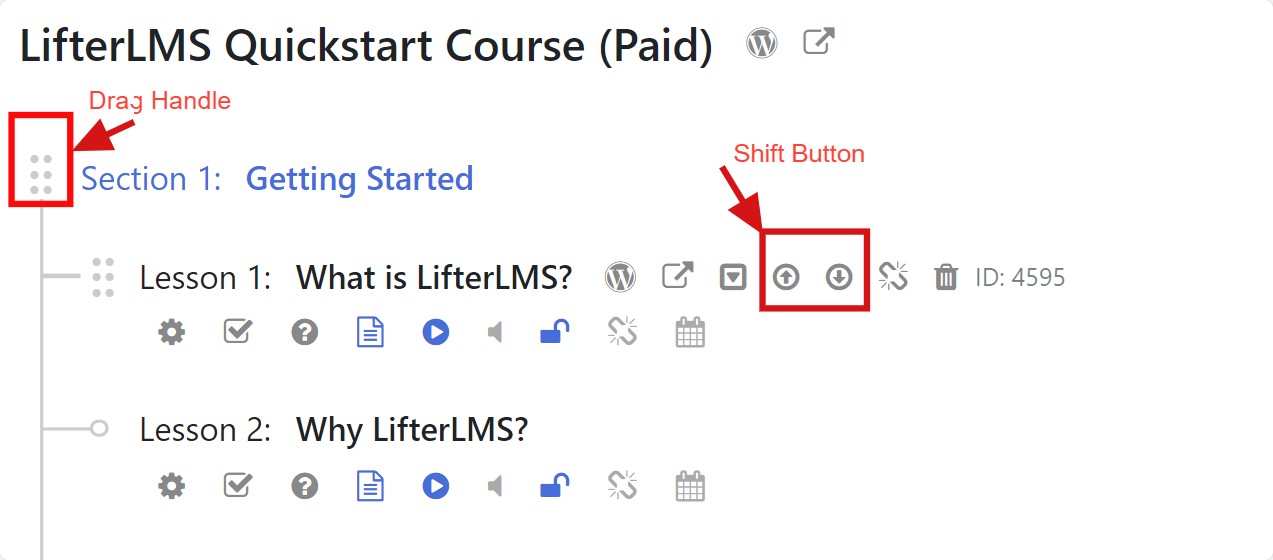
Clicking the up-arrow shift button will move the lesson or section one position up and the down-arrow shift button will move the element one position down.
In addition to reordering within a section, lessons may also be moved between sections. When dragging a lesson, it can be dropped into another section and you can use the “Next” and “Previous Section” buttons to move a lesson with a click.
All the section and lesson numbers are automatically calculated and saved when you create and reorder lessons!
The titles of the course and all sections and lessons are editable from within the course builder.
To edit any title simply click on the title and edit the title in the field. The new title will be saved automatically when you hit the “Enter” or “Tab” keys or when you click out of the field with your mouse. If you want to revert to the previous title after making changes you can press the “esc” key before leaving the field.
You can delete both sections and lessons from within the builder.
To delete a section or lesson click the Delete Icon after hovering over a section or lesson header.

Only empty sections (a section with no lessons) can be deleted.
When deleting lessons and sections the deletion is permanent and the content of your lesson will be removed from the database and cannot be recovered!
Lessons and quizzes are both detachable elements in the LifterLMS Course Builder. This means that you can remove lessons from courses or quizzes from lessons and still have the ability to use them again later.
In order to detach a lesson from a course, locate the lesson you wish to detach in the builder. Then hover over the title of the course until you get the icon options. From that list click the “broken chain” icon located between the down arrow and the trash can icons to detach the lesson.
Similarly, to detach a quiz from a lesson, locate the lesson you want to remove the quiz from in the builder. Click on the question mark icon to open the quiz. Once the quiz settings are opened, hover over the quiz to get the icon options and select the “broken chain” icon to the left of the trash can icon to detach the quiz.
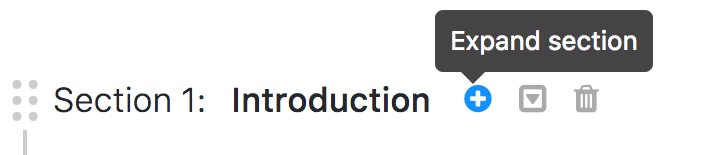
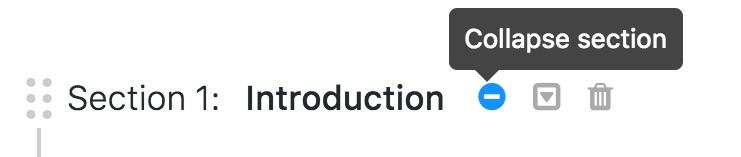
Sections can be expanded and collapsed on the builder in order to make management of large courses easier.
Click the Plus icon to expand a collapsed section:
Click the Minus icon to collapse an expanded section:
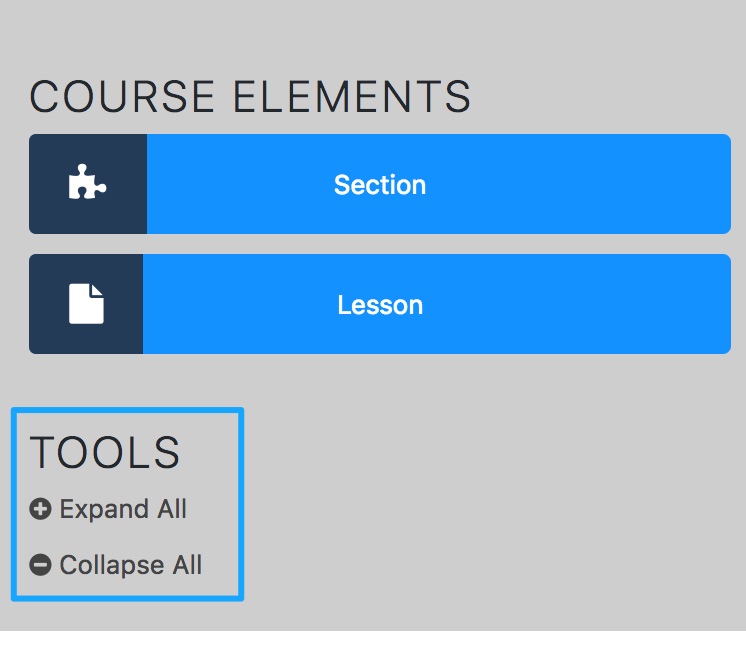
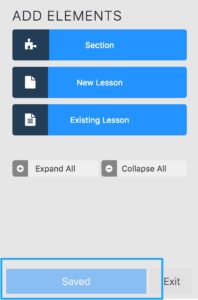
You can expand and collapse all sections in one click by using the “Expand All” and “Collapse All” buttons on the sidebar.
All data is automatically saved via the WordPress Heartbeat API.
The saving status indicator at the bottom of the builder sidebar displays the current saving status and errors when saving errors are encountered.
The indicator may display 3 different statuses depending on the state of your course:
- Saved indicates all changes have been sucessfully saved. In this state the Indicator button is disabled.
- Save Changes indicates there are changes that have not been saved. In this state you can click the indicator button to save your changes. If you wait, the unsaved changes will be automatically saved during the next Heartbeat Tick (more than likely within 30 seconds)
- Saving Changes indicates that data is currently being saved.
If the WordPress Heartbeat is disabled, changes will not be saved automatically and manual saving is forced on for all users (see below).
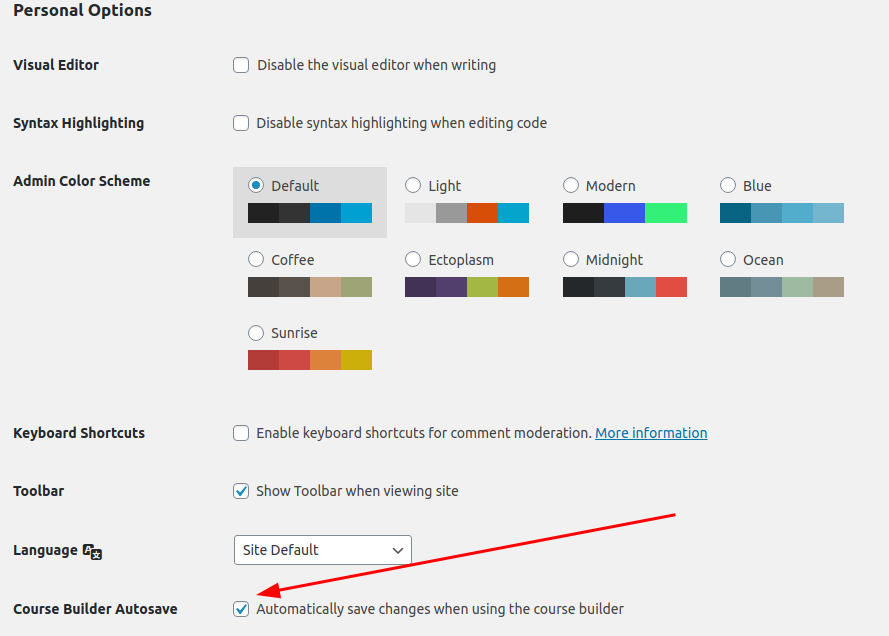
By default, auto-save is enabled for all users but if you wish to disable auto saving, each user may opt-out on their user profile:
- On the admin panel, navigate to Users and select a user
- Locate the option “Course Builder Autosave“, uncheck the box, and save.
The builder will no longer autosave your changes. When you’re ready to save, click the “Save” button to have your changes saved.